Today’s post is a guest post from Mr Pulling Curls. He’s a dutch oven expert and has been taking our cooking heat outdoors the past few weeks. Excited to share it with you. Look for more in this series, sponsored by HomeRight.
Summer is here! And with it comes the opportunities to get out of the kitchen and into the backyard or outdoors and flex your cooking muscles.

“But how do I find and use heat sources to cook with?”
“What are the best tools for me to cook with?”
“How do I maintain a clean cooking space?”
“HOW DO I EVEN GET STARTED?”
While the modern kitchen setup may not always be available in the outdoors, the principles of cooking are the same whether you are in the kitchen or out amongst the trees and wildlife:
- Heat Management
- Tools of the Trade (I’ve got some cool ones to share here!)
- Cleanup (aka …Maintaining Equipment for the Next Adventure)
Ways for Good Summer Cooking!
Cooking with wood
Cooking with a wood fire is a great opportunity to learn and teach about fire safety. While having an open fire is not without risk, the benefits in obtaining lifelong memories, outdoor skills, respect for the outdoors and the power of fire, and appreciating the gifts that exist in Nature are worth the effort. If you are cooking hotdogs or s’mores, just about any camp fire setup will do the job. But to cook in a Dutch oven or with tin foil package meals, the skill is in creating a bed of hot coals and knowing how to manage and maintain the heat.
Managing the heat with an open fire, once it gets down to the coals is a possible challenge. While the measurement is not as accurate as your oven in the kitchen, a good method is the hand test. Note: Do not put your hand on the fire or coals!
Before you begin putting ingredients in your Dutch oven, take off the lid and put your hand above or just inside the oven. If your hand can only be in for one second, the temperature is over 500 degrees. For every second after that take 50 degrees off from 550. Eight seconds would be about 200 degrees. Again, this is an estimated guess, but gets you in the ballpark. Some people have a higher threshold for heat so it could be different for each of us, but it is a pretty good estimate.
Again, Be careful with fire! Treat it with respect and it can be a powerful tool.

Cooking with charcoal
Cooking with charcoal is very easy with the right tools. I have preferred to use a charcoal chimney to get my coals going when I am without electricity.
When I am out in the woods, the chimney allows me to minimize the amount of space I need to prepare my heat source and the impact my cooking has on the environment. Charcoal chimneys are built to use a variety of fire starting strategies—newspaper or dryer lint wadding balled up on the bottom, for example. However, my go-to strategy of choice is to use paraffin wax cubes. It saves a lot of packing space and 1 or 2 cubes and a match is more than adequate to get the chimney nice and hot.
In the backyard, or any place you might have access to a power outlet, I would recommend using a hot air fire starter such as the ElectroLight from HomeRight. In just a few minutes, my coal piles in the fire pit are glowing red and in 5-10 minutes I have a good selection of coals to get my Dutch oven ready for cooking. The ElectroLight is also great for getting open wood fires going strong. Check out this video to see how easy it is!
2018 Update: HomeRight (which was actually bought be Wagner, so it may also be sold under the brand name Wagner) has released a NEW Charcoal starter (it’s replacing the one shown in this video). It starts the charcoal the same way we did, BUT (and this is exciitng) it then has a 2nd stage that will blow air on the coals to help them heat up and get ready even FASTER! Pretty cool!

Let’s talk a bit about what dutch ovens I use (and recommend). I usually use my Lodge 12″ Dutch Oven for most things, but when I’m cooking for a crowd (I moonlight as a scout master) I use my Camp Chef 14″. Be sure to use a liner for easier clean up (plenty linked below too).
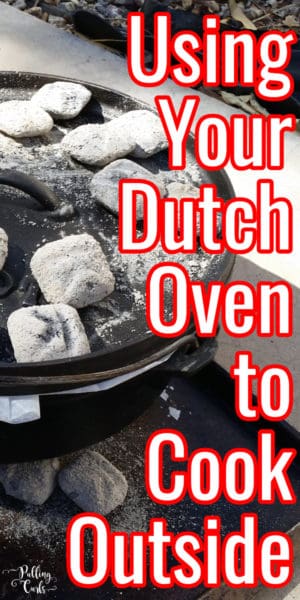
Generally, for a 12” Dutch oven, you will be using 20-25 coals. If you are making a stew or similarly high liquid content dish, you can have an equal amount both on top and bottom. You can even have more coals on the bottom without too much worry of burning the meal. If you are doing a baking dish such as brownies, breads or cheesy potatoes, it is best to use this equation:
Top–diameter of the oven + 3 or 4 coals (12+3=15)
Bottom –diameter of the oven – 3 or 4 coals (12-3=9)
This equation will help you keep from burning the brownies that your family and friends have been waiting for for the last 2 or more hours.
Some dishes require rotating the lid and the oven in quarter turns every 15-20 minutes, but stews and soups are very forgiving and can be made with the oven in the same placement for the entire cooking process. Just make sure that you pot is level so that you don’t spill any of the precious contents inside.
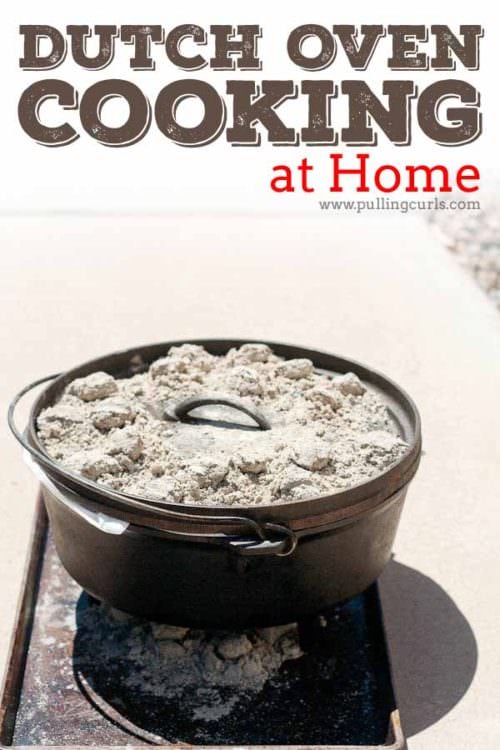
When I am cooking at home, I like to use an old cookie sheet to manage my Dutch oven space and keep the coals from scarring my concrete pavement (the most level space in my backyard). When the cooking is done and the coals are cold, just dump the ashes off the cookie sheet into the fire pit or trash bin (make sure they’ve cooled), rinse off the cookie sheet and let it dry, and you are ready to go for the next time.
Some of the other items I use when Dutch Oven cooking are:
- Heat Gloves — these are great for flexibility in grabbing things.
- Paper Liners — especially great with baked goods. Makes clean-up a breeze!
- Tin Foil Liners — Cleaning dutch ovens can be a bit of pain at a campsite — this makes it SO much easier!
- Lid Lifter — super handy. Often ovens come with it, but if you don’t have one, I’d really recommend you get one!
- Lid Rest — this hovers your lid above the ground and has tons of other uses too. Stay tuned for another post about this guy! This one is super handy too (and a little less complicated).
- Tongs — great for transferring/moving coals. Often you can find tongs cheaply at a 2nd hand store (we always seem to find a lot of good items for outdoor cooking threre.
- BBQ Utensils — like a long metal spoon (for stirring) or a spatula
- A tote for keeping it all in. It’s nice to have it all together!
Of course, charcoal can also be used with your favorite grill. Lara over at Overstuffed has a great post on cooking the perfect steak!
One of the largest benefits to the HomeRight fire starter is that you don’t need to use lighter fluid and you won’t end up with the lighter fluid taste/smell in your food. #extradelicious. Also, you can just as easily use the cheaper charcoal without lighter fluid added. The fire starter starts them all the same.
Cooking with propane
Sometimes, at least here in Arizona, much of the area is under severe fire restrictions during the summer months. Open flames and charcoal are usually banned during these fire restrictions. However, it is still permissible to cook with propane. There are some great options for Dutch oven cooking using propane. The Volcano 3 Grill is a multi-use grill capable of using charcoal, wood, and propane fuel sources to operate. King Kooker and Bayou classic also make some great outdoor propane stoves for dutch oven cooking. Don’t forget the old standard Coleman stove. I still have my eye on one of those!
Cooking with a propane burner under the Dutch oven is very forgiving with stews, chilis, soups and any other recipe that have a high moisture content.
“Can I still make Dutch oven brownies with a propane burner?” Yes, though I would use a heat bonnet (this one is good too!) to maintain a consistent convection cycle around the Dutch oven. In fact, I would recommend having a heat bonnet or heat shield if you will be cooking in rainy, cold and/or windy conditions in order to keep the process as efficient as possible. It is possible to cook without a shield or bonnet in these conditions, but it will add a significant amount of time to your cook time.


 Drew Erickson is a former high school band director, who has recently cashed in his hash marks for hashtags. Drew has to live with Hilary and functions as an editor for her insanely fast typing skills. Can you imagine how painful that is? That’s why he’s willing to put his hand over a 500 degree Dutch oven. #nobiggie . You can find out more about him on his LinkedIn Profile.


FreshBabyGear says
Great tips!
I’m preparing for outside party, and I want to make grilled fish.
Do you have any suggestion for it?
Hilary says
Hmm, I’ve always used a grill pan for fish…. otherwise it falls apart.