Organizing corner cabinets can be REALLY hard. They are often awkward but do have good storage space. In this post, I share some of the ways I organized mine an how a simple $15 changed how much easier it was to use!
Ok, let’s step back into 2013 when I had a corner cabinet that was JUST a mess it.
You know you all want to see it.
Admit it.
Hilary (The Organized Mom), with a cluttered cabinet? The outrage. {please note sarcasm font}
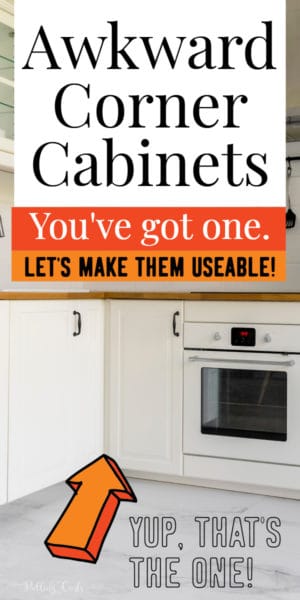
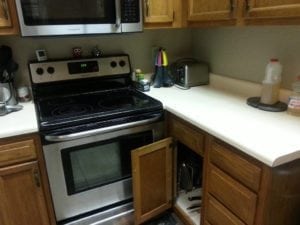
SO, yesterday I decided to tackle this wonky cabinet we have by our oven (wonky being a very technical term). Here’s a “zoomed-out” picture to show you it’s in a “wonky” spot. I know you know what I mean. You really can only mostly see the cabinet door.
Ok, so here’s our kitchen. TO the left is our fridge, and to the right is the entry into the dining area (which we use as my blogging shrine…). The cabinet in question is the one there on the right at the bottom. Its door is open, it’s a tiny door and a big cabinet that extends back to the wall to the right of the stove. It leaves you reaching WAY back there.
Anyone else have a cabinet like this?
Also, it’s just half a shelf on the top. I decided to keep my pans in here (keeping things by where you use them, aka, the stove). I also have some extra #10 cans of wheat back there. Is by your stove the best place to store wheat?
Maybe not, but honestly is Arizona the best place to store food? Maybe not.
Gotta do what you can, right? 🙂
So, my problem was pans. I was piling all my frying pans of random sizes all together. You know, stacking them. This was problematic in a few ways:
1. It could scratch the non-stick coating, which is not good.
2. It was a PAIN in the pa-tootie when I wanted to get out any frying pan (and the largest is not the one I reach for most frequently). I also had lids rolling all around in that place.
My kids empty the dishwasher and sometimes just toss stuff in there. Because there wasn’t particularly a “system” it made it hard to be upset about things like that.
So, I took some organizing stuff I’d gleaned from the internets and came up with this:
First off, let me say that if I’d had this cabinet in California it would have be PACKED TOP to BOTTOM with stuff. I would have been so grateful for this cabinet I would have worshipped it in a sad and pathetic way. It was a small kitchen — this much space would’ve been overcrowded for sure.
BUT this is Arizona and my kitchen is a lot bigger, and the sad truth is that in order to really organize this cabinet I couldn’t pack it top to bottom (and I have more convenient ways to store less-used items now, like on the top of my cabinets. I’m classy). This kitchen just has a lot of space compared to our previous house.
BTW, we know kitchens require some cleaning — so grab my cleaning schedule here:
Here’s a few other kitchen posts you might find helpful:
- Zoning Your Kitchen
- Decluttering Your Kitchen
- Kitchen Sink Organization: The big tips making dishes easier!
- How to Clean Your Kitchen: Cleaning in Circles
- Organize Your Kitchen: Genius ideas for your most-used room
There’s definitely more room to put stuff in here, but it’s so awkward it’s difficult. I certainly could add a few more food storage cans.
Oh, and don’t judge my cabinet paper or lack thereof on the bottom shelf. I already spent 20 minutes explaining cabinet paper to my oldest. It wasn’t pretty {btw, he was my partner in crime on this one. I really like passing on my OCD showing my kids how to organize effectively}.
So, back to the lower cabinet. In it, we have:
- 5 #10 cans (don’t have to be here, but it’s a good place to store cans, I may add a few more in the coming weeks)
- 5 frying pans
- 2 smaller pots, one larger pot.
- Lids (one of our lids fell victim to our tile floor, so I got a giant multi-purpose lid that is extra annoying, but also super handy)
- An extra set of stainless steel bowls that I rarely use, but I can’t part with for some sad reason.
- A cast iron pot (my mom gave me this, it was theirs when I was growing up, I love it!)
- A smaller grill pan.
- A splatter screen (one of my favorite things to help keep my stove clean when I’m making a tomato-y sauce)
The good news is that this is most all pots and pans — no small appliances or things REALLY weird to hold. I knew would could make this a great storage space, and be accessible (if we didn’t over-pack it).
The bad news is that pans are all round shape items that don’t often stack well and are bulky to organize in a corner space.
The corner of a kitchen can still be a REALLY important place to be — and this is for us. We do a lot of food prep here by our stove and the other kitchen cupboards hold spices, bowls and kitchen tools nicely!
Again, there is PLENTY of room for all this stuff but with the whole small door and the wonky space behind the stove I grumbled each and EVERY time I got something out of it. I think they call this a blind corner cabinet (probably because you can’t see anything in it)
What I did (I talk a lot about this process in my free challenge here).
1. The first step (and a good idea) — I removed everything from the cabinet.
2. Cleaned out the whole cabinet with an antibacterial wipe (actually, I had a child do this). If you’re cleaning out, you might as well CLEAN out. This can be the best part because things look so great when you find your simple solution!
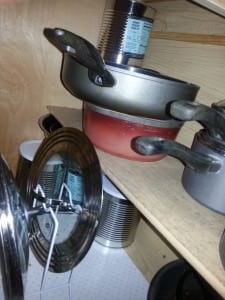
3. Shoved the wheat to the back of the cabinet — in the bottom corner. I think nothing is actually in the MOST difficult corner to get to (the one right next to the stove). I then was able to shove the bowls on top of the wheat before the 2nd shelf. You can kind of see that here. It’s not something we need easy access to.
Pro Tip: Put large items in the back. If I put a bunch of small items back there I don’t think I could literally get them out — it’s SO hard to reach (I could send a kid in though).
3. I then looked at our stuff and thought about how often we use any of it. The red pan probably gets used least (but still probably every other week). SO I put it next. BTW, this whole system is from my 5-word Organization Challenge — it’s totally free, and it’s going to change how you see organizing:
My mind wandered. I just hated all those lids and I knew the budget for my little cabinet remodel was tiny. I was going to use my dish drainer as a lid organizer, but then I saw to replace it would be like 20 bucks (I have a small one in my sink that is crazy handy, but expensive).
Solving the problem of rolling lids:
So, I went to Walmart (you could easily find this at a place like the Container Store too) on my way home and found something like this (I love that this one is adjustable). My problem is that I needed it to be small enough to fit between the wall of the cabinet and before that 2nd shelf, so mine only has room for like 4 lids. I wish it held more, but life goes on, right?
I brought it home and {angels singing} it worked! No more rolling lids and I had a system that my kids could understand and follow (as well as any kid follows any system).
Solving the problem of stacked pans:
At this point, I had the pots on the bottom and all of my pans stacked on the shelf above and I still hated having to pull all those pans out to get my tiny little frying pan to do an egg in the morning. So I dabbled in our friend the internet and found this little diddy.
It’s made by Rubbermaid, you can get it on Amazon. It’s REALLY Sturdy and the “racks” are really well coated so the constant pulling and pushing in of pans aren’t going to wear it down to the metal, or at least I think so.
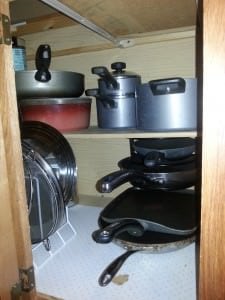
The sad news, is that the top shelf is just under 12 inches so it just slides into the bottom part of the cabinet (good news is that it’s wedged in there, so I’m not worried about it tipping), and nothing can fit on top, but I am LOVING how easy it is to pull pans out.
The other sad news, is that the bottom rack isn’t large enough for our largest frying pan. So I had to figure out a home for it elsewhere, but that gave us an extra spot for the griddle pan. Horray!
Also, there’s room enough on that shelf that if I got one more smaller frying pan it could fit on top of that if need be, but that brings me back to the whole scratching your nonstick coating business. Blech…
So I came up with the option of putting the larger frying an on top of the red one. It literally fits nowhere in any other cabinet, I tried. That sucker is BIG (but great for large stove-top meals, I really like it — I got it Costco).
Then, the small pots can stack next to it (with lids, that frees up some room in my lid organizer — think the kids will remember to keep them together) and my most-used pot next to them (its lid is the one that shattered, so I wish it had a lid to go with it, but it doesn’t). If anyone has a brighter idea for this large pan, please share. I’m mulling over putting it under the stove, but that brings me back to the whole “no stacking” thing, and this way is probably more convenient, but time will tell.
Ta-da!
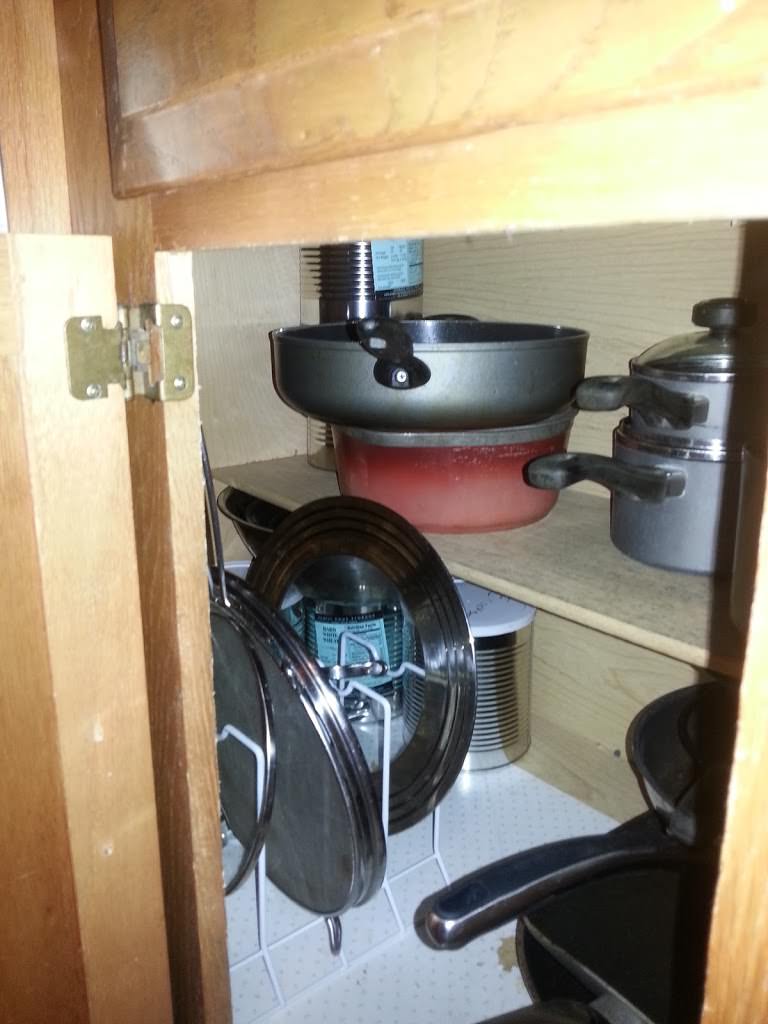
It’s my useable cabinet. I’m hoping it stays as useable. I’m on the lookout for other stuff that could go at the back.

We actually sprung for some pull-out drawers in the rest of the kitchen, but it just doesn’t work here. These blind cabinets in kitchen corners are tricky!
In our other kitchen corner cabinet we utilize a Lazy Susan. But it just doesn’t work in this (because of the oven). The Lazy Susan’s rotating design sure makes it simple to get to all the things and food items. We keep oils and sauces on top and food storage containers on the bottom.
We do actually have an upper corner cabinet that is similarly as bad — it’s just not as deep, or painful. But it is still an awkward corner cabinet space. Once again, I prioritize things we REALLY use at the opening, and push things we RARELY use in the corner. I also try to make it as easy as possible to move the things at the front opening (container those things so I can take them out), so the back corner things are at least somewhat accessible. Some day I hope to have minimized our needs enough to leave that back lonely corner as dead space.
In some ways think upper corner kitchen cabinets are even worse (than bottom corner cabinets) because you have to be taller to get all the way back there.
Best Thing Tip: Put small items into a container (I love Ikea various containers) in easy reach — that way it’s easier to pull them all out to access any specific items in the back.
The best way to organize is to always put the things you reach for the most as the most accessible. A great way to do this is to separate out the most important things.
Here’s the best news: Total Budget about 15 dollars with tax.
So, do you have a wonky cabinet? How do you organize it? Inquiring minds…. I hope this helps you organize your own corner cupboard.
If you’re thinking — HILARY, it’s not just one cabinet at my house — it’s the whole house!
I was the same way. Things like this just made me want to burn my house down rather than find a fix. BUT I found something that really helped.
I needed a process that…
- Got MIND on track to what you want your organizing to look like.
- Gave me IDEAS to help you organize spaces of your own
- MOTIVATED me to keep going and make a change.
It’s called The Organized Home. It was created to help families organize and not feel so alone while they’re doing it.
Organizing is hard, it can feel REALLY tiring, so a little help can help a lot!




Lisa says
I got so tired of digging into it to get stuff that I took everything out of mine and stuck a cat bed in it. Our scaredy-cat can open the cabinet door herself and basically lives in there because she’s afraid of EVERYTHING and it’s easier to find her than having to hunt through every nook and cranny in the house!
Hilary Erickson says
It’s honestly a great cat home. 🙂
Mona says
My blind cabinet is next to the stove as well however on the opposite side of the wall is my laundry room so my husband put me a cabinet et door in the laundry room and k is I store items I do e use that ice ten in it, when I need it I go the laundry room and access it easily where before I had to dig around to get to it
Pulling Curls says
What an awesome solution! Thanks for sharing 🙂
Amita says
My mom puts a clean, dry wash cloth in the bottom frying pan when she has to stack them or a folded dish towel depending on how big the pan is. So far, no scratches in the non-stick coatings.
Hilary Erickson says
That’s a great way to do it!
Jo Mo says
It looks as though the handle has a generous opening. Can you find an over-sized cup hook (maybe a coat hook) and install it high on the front wall above the lid rack? The pan should hang just above the lids but still be within arm’s reach while you are standing. We did something similar to take advantage of unused vertical space in a bathroom vanity.
Deb says
Could you hang that large pan on the inside of the cupboard door on a command hook?
Hilary Erickson says
I think it might be too heavy for a command hook…..
Janet Miller says
I just wanted to say….the drawer under the oven that is supposed to be a warming oven, which I have never used for that……I put all of my pan and skillet lids in it. It keeps them from falling out of the pan cabinet and it saves buying lid holders which don’t hold as many. Works good for me!!
Hilary Erickson says
I use it that way too!
Teresa Escareno says
I put my lids in the oven drawer also!!
Esther Kinney says
I thought I was the only one with such a cupboard. However, yours has a wider opening than mine – pots and pans would never fit through. Anything small enough to fit in the door is too small to reach if it gets pushed back. I can’t fit my shoulder through to reach to the back of the cupboard. I have placed things just inside the door and left the rest of the cupboard empty in spite of the fact that I have a shortage of cupboard space. I try to keep as much as possible reachable for my companion who is in a wheelchair. Also, If something is rarely used and then hard to get out, I will do without it rather than go to the trouble of getting it out. I have learned to keep some kitchen things in other parts of the house.
Hilary Erickson says
Oh man, that does sound like a VERY un-useable cabinet! I do have to send kids in to get the stuff in the far back. 🙂
Lisa Covey says
Would a plastic shoe box fit in there? Then you could put things in that and maybe other items where they were.
JoAnn says
I have the same cabinet space. I was storing all my casserole dishes in there. The cabinet I had my pots and pans in was not big enough and all the handles stuck out to where the doors would not close. Just as I started reading this, I got the idea to do some re- arranging. I put all my pots pans and skillets in the corner cabinet and I used metal shelves to give more shelf space and they all fit great. This also gave me the chance to purge the ones I never use or have multiples of. I had way too many pyrex casseroles also.
Thanks for sharing. I have a picture of what I did if you would like to see mine.
JoAnn
Pulling Curls says
I’m so glad you found something that worked for you. I think that’s the biggest thing to remember when organizing, it has to work for you and your space! Have a great day.
Noelle Decker-Phillips says
I have a large corner cabinet that had 2 doors attached in the corner and hinged separately the corner! The opening approximately 8 to 10 inches. Too small to reach the back. I kept Tupperware and cookie sheets, lids and smaller appliances. My guys husband and teen would “help” put away dishes throwing it in. I got tired of it one day. DONE! I threw everything out across the kitchen floor! I heard my teen come into the living room asking what mom was doing. Husband said I’d just stay out if you want your head. I marched to and from the garage with screwdrivers and saws. There is no longer a post in the middle and 2 doors gone. I put a lazy Susan tray that fit through the new opening.
Hilary Erickson says
love how everyone experiences things differently!
Linda Kirk says
I put my double boiler all the way in the back since I only use it for Christmas goodies. BUT I tied a long string to it (the length of the cabinet) with an index card on the end labelling which pot it is. Then I stacked my bowls which are just around the edge of the cabinet but reachable. The bowls are on top of the string. Finally the pots are stacked and covers are against the wall. Fry pans are on the short shelf. Admittedly, I have to pull all the pots and bowls out, but it’s easy to get the double boiler by pulling on the string. Could also get a box or container for the small things and run a string thru a handle and push it all the way to the back. No kids needed!
Pulling Curls says
This is a great idea. Thank you so much for sharing what works for you!
Therese Long says
My lower cabinets seem to be the catch all for items that I rarely use. Just the thought of having to dig under there for anything makes me change my mind about even using them. I know they are necessary but totally usable space for me. I really wish that there was something inexpensive that I could do with them to make them more useful.
Pulling Curls says
I hate when that happens. I wonder if it would be more helpful to add some sort of basket or something that you could move toward the back to block more useful things from getting pushed back. Might be worth a try 🙂
Tonya Uhde says
I have a lazy susan in my corner. It used to house the cereal and baking goods when the kiddos still were in the house. Now that they have their own houses, I don’t bake near as much and we rarely have cereal in the house. I don’t get into the lazy susan very often now… what can I do with this space? I’d like to take the ls out and put a shelf in there but I’m not sure… Suggestions? 🙂
Thanks!
Hilary Erickson says
Man, that’s tough — I think I prefer a lazy susan…. just because it’s hard to get stuff out. Have you seen the lazy susan drawers? Variations off this: https://www.build.com/product/summary/1766223 — might be nice?
Tracy says
Try a set of pans with detachable handles. It will change your life
Hilary Erickson says
Oooo, I bet it would!
Erika says
I have this awkwardly irritating cabinet– and while I have not come up with a perfect solution, I do keep my lids in a square fabric basket in there [to contain them] so when I need a lid– there they are. I also have a favorite frying pan that I use quite often [the knob on the top of the lid has broken off so we just use potholders and curse words to take it off it’s pan when in use].😄
I’m definitely going to try this pan organizer to organize better– hopefully it works for me!
Pulling Curls says
That is a great idea for the lids and I hope it it does work for you!
Debbi says
There are companies that make “blind corner” pull out shelves for exactly this situation. They are not inexpensive but it’s a solution that works. Rev-a-shelf makes one.
I like the ideas in the comments also.
Hilary Erickson says
Because my oven is next to it– it makes it trickier…. good point though!