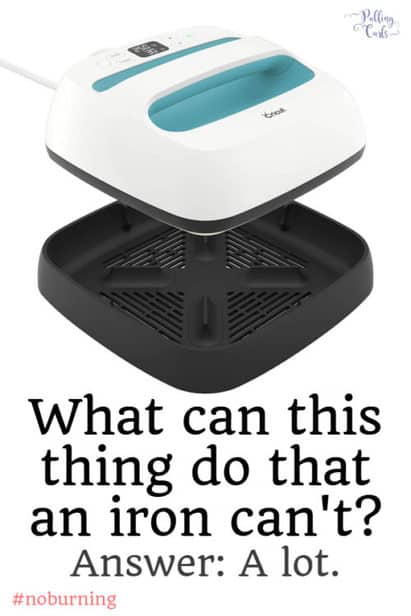
Ok guys — we’re to post #2 in my Cricut Series! Today I’m sharing the Cricut EasyPress Machine! Now, I have burned a few things trying to get vinyl to stick to a product… but I’m ready to try it with the Easy Press! 🙂

Friends, I have to say I was pretty nervous to try out the Cricut EasyPress! In this video (scroll down a bit to see it), I show one of my burned projects. And I was actually the inspiration behind my friend Katie’s post about burning stuff. 🙂
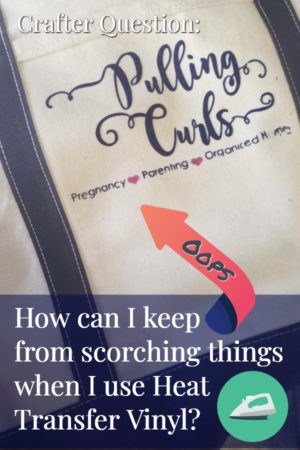
I actually have a bag I carry around conferences I’m at that has my logo on it — and it’s a little charred…. You can’t really see it, and I’m sure people think it’s just a shadow — but yeah.

I just couldn’t get it to stick, and I was standing on a chair pushing ALL of my body weight (which is not small) onto my household iron, onto my bag.
Well, you get the picture. 🙂
In all fairness, that logo still holds tight to the bag (and the small lettering was always too small… my bad). Go me!
Full Disclosure: This is a sponsored conversation written by me on behalf of Cricut. They sent me the Cricut Maker & the Cricut Easy Press Machine. There was no obligation that my post be positive. The opinions and text are all mine.
In this video you’re going to see my last charred project (that my daughter still loves, bless her heart):
BTW, if vinyl also has you a bit confused I have a whole post on easy everyday iron on vinyl!
Ok, so let’s review some things I loved about the Cricut EasyPress
- I did not have to stand on a chair and force my knee to press it down on my base material. Super simple!
- I didn’t mention it in the video, but it comes in different sizes — so you can pick one that is the best option your storage space and project sizes.
- I was SO surprised it worked! It worked SO well. I’m just thrilled!
- It takes up much less room than a traditional heat press and works so much better than home iron.
My ❤️ hotels for your Disneyland trip:
– Best Western Park Place — it’s the CLOSEST hotel, has a breakfast and if it’s available for your dates, BOOK IT. If not, check out the Tropicana.
– Cambria – this is my favorite one with a great price point for larger groups – has a water park and free breakfast (not walkable though) – but if you want a walkable suite check out Castle Inn
Ok, here are some helpful tips for your Cricut Easy Press Machine:
I love the EasyPress Mat for the Cricut Easy Press
It makes it SO easy to iron on any surface. My counter didn’t get hot at all and it was convenient to do it right there. You can use a folded towel but this makes it so nice to press with your EasyPress on a counter or table work surface. For best results, I highly recommend not using an ironing board, you want firm pressure when using heat press machines and ironing boards will flex away from you.
I love the degrees and the countdown for the Cricut Easy Press
Honestly, guys — that makes it 100% worth the price. No matter if you have the Cricut or Silhouette, the degrees makes it SO much easier. Before they would say a setting, and I was never sure if I was on the RIGHT setting. Now I know – -and the timer counts down the heating times for me! It’s far superior to a regular iron. FYI, you can get the Easy Press machine at both Cricut and on Amazon.
Easy to apply pressure with the Cricut Easy Press
Because the handle is so big, it’s easy to apply enough pressure (just push down here, nothing crazy) to the project.
but, MOST of all…
I love the Interactive Guide for the Cricut Easy Press
They give you a free trial project in the box (I LOVE this — it helps give you confidence that you can do it correctly!)
Then, when you’re ready to do your own project just go to https://home.cricut.com/easypress-heat-settings-guide.
Then input what heat transfer vinyl you’re using, what product you’re putting it on and BAM — all the instructions are there! It has all the different materials listed, what heat settings to use so you don’t use too much heat, the amount of pressure to use, and whether it’s a hot peel or a cold peel. It really walks you through step by step to make sure you have the best finished product.
It even reminded me to pre-heat the item. #loveit
Full disclosure: I did not wash my shirt in advance, but I recommend you DO that — as some products come with a finishing spray or something that makes it harder to get the vinyl to adhere to the fibers of the fabric (I think that’s the main problem I had with my canvas bag — but I digress).

One other thing — I totally recommend the…
Cricut Weeding tools for the Cricut Easy Press
Weeding vinyl was one of the WORST parts of trying to do my bag and other items before.
Good thing these Cricut weeding tools make it SO, SO, SO much easier! Honestly, I wouldn’t buy a Cricut cutting machine until I could buy the tools to go with it, that’s how much I love them!
Also get the iron-on protective sheet or teflon sheet is a good idea for protecting your exposed layers of iron on vinyl, but you can also use an extra piece of the plastic carrier sheet.
So, with that we have a shirt and my son LOVES it.
It’s a great project to try at your house as it doesn’t have a lot of intricate work and it could make some teenager at your house SUPER happy. It sure did make mine happy. 🙂
If you liked this post — sign up to hear about it the next time I post, and check out my other Cricut posts below that:


Leave a Reply