Making your own t-shirt and fabric products can feel VERY fulfilling. However, it can seem really daunting to cut your own vinyl and apply it to the blank of your choice. Let’s talk about some frequently asked questions about Cricut Everyday Iron-On Vinyl.

Cricut Everyday Iron-On Vinyl FAQ’s
Vinyl can be intimidating, especially if it’s your first time making a new project. So many different kinds and it has difference from regular cuts — so let’s talk about some questions many new Cricut Iron-On Vinyl users have!
FYI — This is a sponsored conversation written by me on behalf of Cricut. The opinions, ideas and text are all mine (as per the ususal).
My list of can’t-do-without Vinyl Tools:
- Essential Tool Set — GREAT for weeding, and making straight cuts in vinyl
- Brayer — just makes getting vinyl on your mat SO much easier!
Those two are the main ones. Clearly, you need a Cricut machine (I used my Cricut Maker) and a blade, and mats — but those two are different needs for iron-on, in my opinion!
Why do you have to mirror?
Ugh! It’s the worst. To get that all cut-out and perhaps even weed it — and then. {sigh} It’s backward. I have so done that. So I hear you if you’ve made that mistake as well!
You have to mirror because you are cutting it backward. The “transfer tape” for iron on Vinyl is next to the sticky part of your cutting mat.
So, just make sure you click the “mirror image” box before you cut. Thank goodness it’s that easy!
Just make sure you do it! Cricut makes it easy to remember (but I’ve still forgotten a few times).
Why no transfer tape?
There is no transfer tape required with Cricut Iron-On Vinyl because the plastic carrier sheet is already attached to the iron on vinyl.
It makes it REALLY easy!
Also, it is why you put the SHINY SIDE DOWN when you cut Cricut Iron-On Vinyl! That means you are putting the shiny transfer tape on the sticky mat surface.
There’s just a lot to think through as you’re cutting this vinyl, so trust the process… and remember the rules
- Mirror
- Cut with the shiny side down (both sides are shiny, but the one with transfer tape is MORE shiny)
What is the best way to store the vinyl?
A lot of people like to use this IKEA bag holder, however, I don’t have an entire craft room to devote a wall to vinyl.
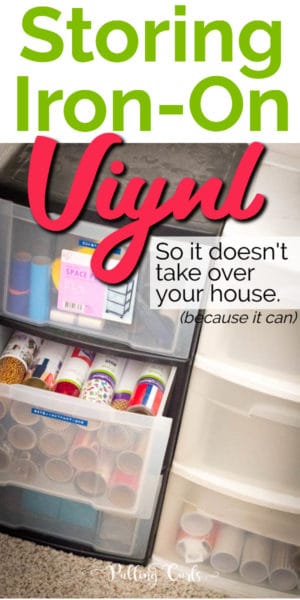
Now I just keep them in rolls in a Sterilite set of drawers. It’s probably not as organized, but it works for us and can easily hang out in our guest room.

I found this cool Pinterest board that has a lot of cool ideas.
What are the differences in the type of Vinyl?
Cricut offers a few different types of vinyl — which you can see in the video:
Btw, this shirt was designed by my friend Amber from Amber Simmons.) We used them at Snap Conference (very fun!).
Easy Iron Every-Day Vinyl — this is your basic vinyl. Some companies call this heat transfer vinyl — and this acts the same as those. Cricut makes a great product, and this transfers well. I especially love it when combined with the Cricut EasyPress. SO easy! Find Everyday Iron-On Here.
Iron-on Foil Vinyl — this guy is super shiny, just like foil. Gold comes in both the Every-day AND foil, but if you want it shiny gold (or rose gold) use the foil kind. You can find the foil iron on here.
Iron-on Holographic Vinyl — This is holographic vs shiny (it’s a fine line, but hopefully you know what I mean). Find holographic vinyl here.
Iron-on Holographic Sparkle Vinyl — This kind sparkles, but is flat. It also sparkles in a holographic way vs a glitter way.
Iron-on Glitter Vinyl — this is not flat, but feels like you sprinkled glitter on it (rough) vs flat — like the holographic sparkle. They also have glitter mesh vinyl, so that’s pretty cool! Find the glitter vinyl here.
Iron-on Patterned Vinyl — just like it sounds, this has a pattern to it. I find that the transfer tape on this isn’t as sticky (perhaps, so it doesn’t take the pattern off?) – it can make it harder to weed. Find the patterned iron on here.
Iron-on Sport Flex — sportflex iron on is used on super stretchy materials like Spandex – things like bathing suits or yoga pants. Find Sport Flex here.
It’s a good idea read the instructions for the type of iron on vinyl you are using for best results. Some of them require a cold peel, a cool peel, or a warm peel. The Cricut heat guide will give you step by step instructions.
While there are lots of different types of iron-on Vinyl, using Cricut Iron-On is easier in the Cricut cutting machine (it’s calibrated to not cut the plastic backing), and the Cricut EasyPress gives you instructions on how to press it super easily. You can also use your heat press or a regular iron if that’s what you have. It also helps to have the Cricut EasyPress Mat, but you can use a towel too.
What images can I use in Cricut Design Space to make vinyl transfers?
Clearly, you can use items in Cricut Access if you have a subscription, but you can also use other files and import them into Cricut.
- I would recommend an image with pretty clear borders
- I would use an image that is on a white background or is a PNG file with a transparent background.
- I always use the “complex” setting so that it grabs the right cuts.
- You can also use your own design or SVG file.

What is the best way to weed?
I LOVE the Cricut weeding tool!
But, more I love this set (as I think it has EVERYTHING you’ll need at a great price).
A lot of my friends told me to just pull up and cross your fingers. And frankly, that is good advice.
If you have a particularly intricate design you could hold it up to a window, or use the Cricut Brightpad.
Can Cricut Iron-On Vinyl Overlap?
So, sometimes, you’ll want to use a few different colors of vinyl on a shirt.
The BEST thing (although more time consuming) is to NOT have them overlap. Cutting each color individually. This is MOST important when you use the glitter or foil ones. You can do a couple of layers of the Iron On if you’d like to.
Like CrystalAnn shows in this YouTube video:
**As you see in that video, you will iron each individual piece less and then iron the whole thing together at the end to make sure it sticks well. The more you iron the “base” vinyl layers, the more they can shrink, even if you use the Cricut easy press.
So I hear, because this still scares me. 🙂
My friend Katie also has a good tutorial here:
Cricut also has their own video that shows how to layer.
You can also use the Knockout Method and frankly, that is beyond this beginner Cricut user. 🙂 Cricut says that you shouldn’t have glitter iron-on be a base layer. However, messages are mixed as to whether it’s OK to layer over glitter (the texture seems like it might be hard).
I hope you found this post to be helpful. Be sure to check out ALL the Cricut vinyl in their store!


Janet Guenthner says
Thanks! Now I know how to make fun Tees for Parker, Madeleine and Grace!
Hilary Erickson says
They really aren’t NEAR as hard as I’d imagined!
Jessica says
Huge question on any type of vinyl & cutting mats in this crazy HUMID Alabama weather… I don’t have a craft room or basement so with that being said, I have noticed my cutting mats and 651 vinyl are acting a fool. The green mat is extremely sticky (the older ones aren’t sticky enough ugh) and my vinyl isn’t acting right. Any frugal tips?
Hilary Erickson says
That is so weird. I’m in AZ though, so I literally have NO ideas — other than smoothing the mat down on your jeans a few times. The fibers from that will help the stickiness, usually. 🙂
Tammy Cornelius says
Hi,
I have a few questions, I am new to this and have a circuit joy.
1) how can you clean the mat you stick the iron on?
2) I have download a few files but they won’t let me edit them or cut them?
Can you draw a picture in circuit space
?
Thanks for all your help in advance!
Pulling Curls says
You can run it under warm water and use your fingers to rub off any build-up. Don’t scrape off the adhesive. Allow it to air dry completely.
You cannot draw in Design Space, you can upload a drawn image but you would have to clean it up.
Did you then upload the image into Design Space? Did you make sure you uploaded it as a cut file and not a print then cut file? Joy can’t do print then cut.
Karen mccall says
What is the diffence of iron on sport and sport flex? Can u make tshirt out of sport iron on
Pulling Curls says
I’m not sure what Iron-on sport is. SportFlex is a Cricut brand of Iron-on that is made to work with stretchy materials like onesies and leggings. You can use it for making t-shirts just check the recommendations against the fabric of your tee.
Lily says
Hi there! Jumping back into the fun after years of not crafting. Can you use the cricut for vinyl to use as an iron-on to a t-shirt? So would i layer? Can i print on vinyl backwards and will the print tranfer on to the t-shirt? Completely clueless, sorry!
Pulling Curls says
You would use HTV to add to a shirt. HTV stands for heat transfer vinyl. A regular adhesive vinyl won’t stick to the shirt. Make sure you follow the directions for the HTV you choose.
As for a printable vinyl, if you want to transfer it to your shirt you definitely want a printable HTV and again, follow the directions for the one you select. You don’t usually mirror the printable HTV because the adhesive is on the back of the print.
I hope that helps, let me know if you need anything else 🙂