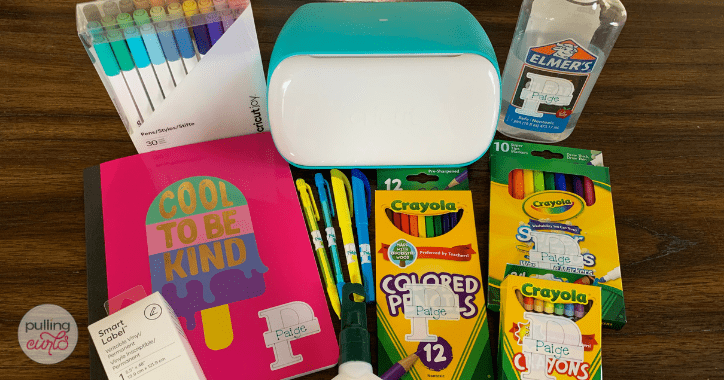
Are you buying more school supplies than ever this year? You can personalize back to school supplies with Cricut Joy and eliminate any concern of supplies getting mixed up with classmates.
Disclosure: This is a sponsored conversation written by me on behalf of Cricut. The opinions and text are all mine.
My kids are heading back to school soon and this year they’re required to have a lot of their own school supplies. We decided to break out our Cricut Joy to do the labeling. From pens to vinyl there are a lot of fun ways to personalize back to school supplies with Cricut Joy. Also, you guys remember that the Joy is my FAVORITE product to use (you’ll see it pop up in my Instagram now and then) because it’s SO easy to take out, use and PUT AWAY. Organizers love it!
Why Cricut Joy for Back to School labels?
The great thing about labeling school supplies is they’re small. You don’t need to cut something 11″ wide so you don’t need to have a larger Cricut machine. You know I love the Cricut Joy and the smart materials make projects like labels so quick and easy (see my pantry project here).
For my labels I’m using a variety of materials; vinyl, writable vinyl, pens and even a piece of faux leather. Have you seen the new Foil Transfer Tool for the Cricut Joy? I’m going to show you how to use it to create a luggage tag that can be added to a backpack.
Small Label for School Supplies
When it comes to your child’s school supplies like water bottles, lunch boxes, pencil cases, and other kid’s school gear you want to make sure that each school item has at least their last name on it. Depending on where you buy your school items, your kids might have the same items as a lot of other students. If their things have custom name labels on them, it will be easy for them to make sure they are grabbing the right stuff each day.
Making small kids labels for these items is super easy with the Cricut Joy, and it doesn’t take a lot of time. You can make several of the same name stickers that they can just stick labels on all their items or you can let them get creative and you can help them create their own design for name tags that they can put on different items.
If you are going to need waterproof labels for things like sippy cups, lunch containers, or sports equipment, you’ll want to use permanent vinyl and make sure you give it time to set completely and make sure you hand wash so they don’t peel. Also, if you need daycare labels to put on baby bottles or food containers, make sure you put the label on the bottom where it won’t end up near your baby’s mouth.
How to Make Labels with Cricut Joy
The Cricut Joy is fun and easy to use! I’m going to show you how to make a couple school supply labels in different sizes. We’ll make writable vinyl monogram stickers, a vinyl monogram, a layered monogram sticker, and a leather luggage tag for a backpack.
You are going to want to make sure you have all of your supplies together for the project so you can craft along with me to make cut personalized labels for your children’s back to school items. You can also easily make iron-on labels for your child’s school uniforms or gym clothes. You can see how I made a shirt using iron-on vinyl here!
Writable Vinyl Monogram Stickers
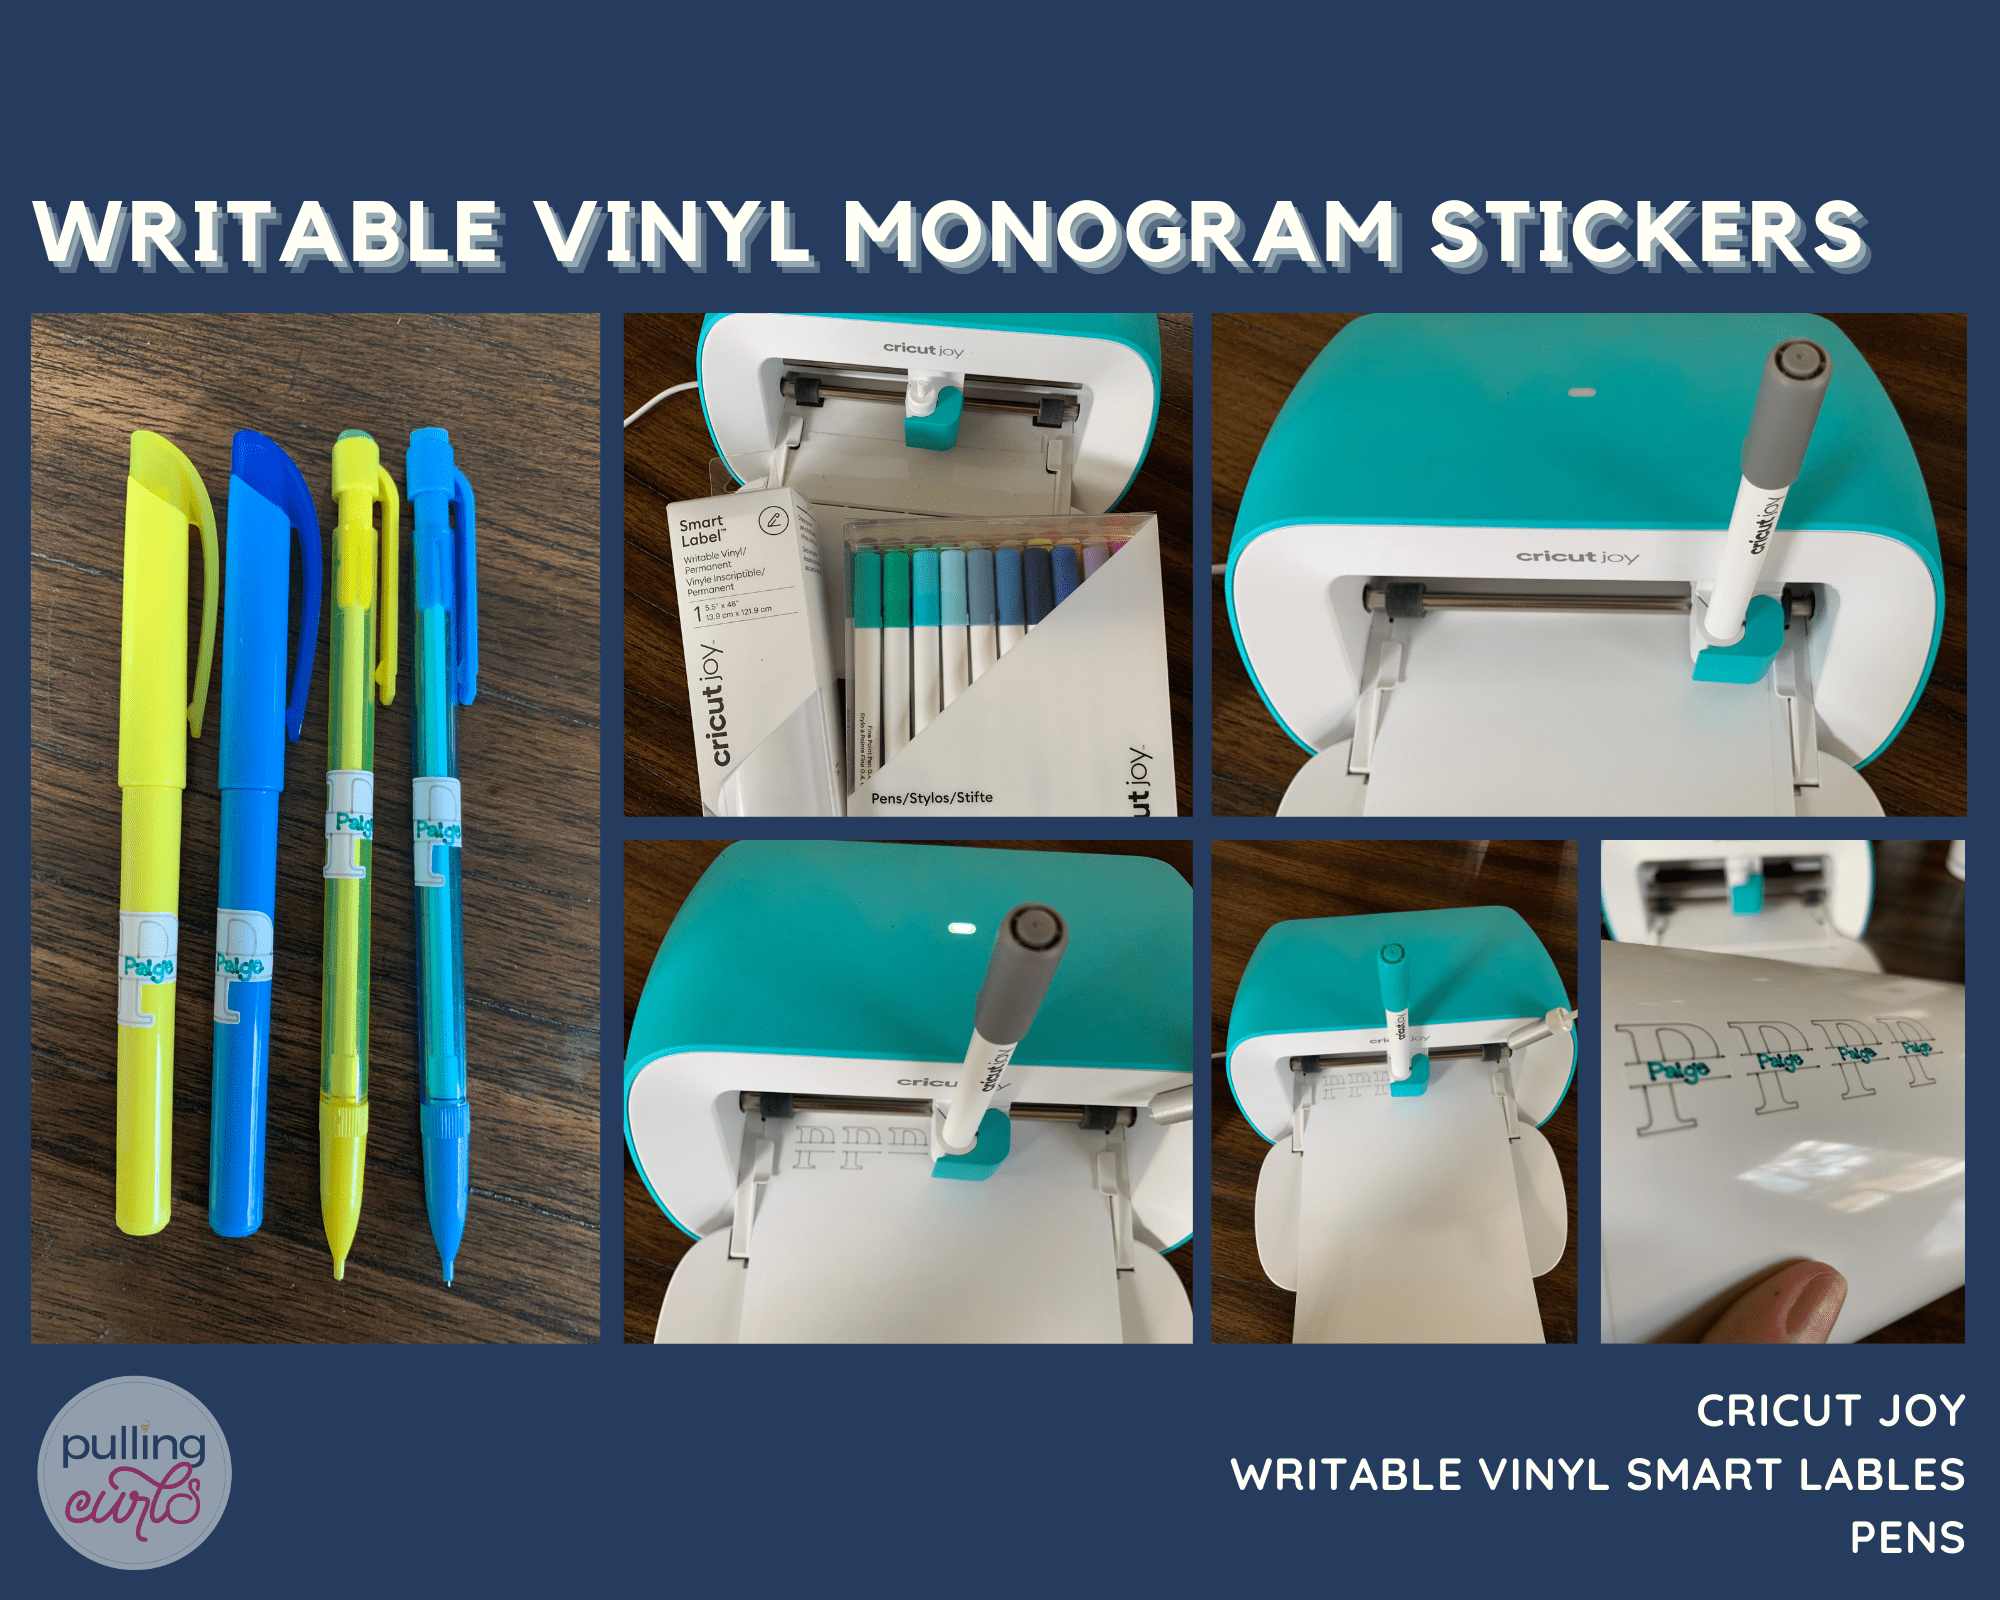
The first labels we made are these writable vinyl monogram stickers. My daughter thought it was so fun to have her pens and pencils labeled along with all her other supplies. There is no question which supplies are hers.
To make these stickers you’ll need the following supplies:
Cricut Joy
Smart Label Writable Vinyl
Cricut Joy Pens – We used Grey and Turquoise
I found this image in Design Space by searching “monogram P”. The image name is “Serif Split Monogram P, Draw” and the number is “#M2610CB74”. I didn’t search every letter but I searched a few and found a similar image for the different letters so I think there is one for all of them.
The overall sticker size for the pens and pencils is only 3/4″ tall. I was really impressed with how well it drew and cut even small.
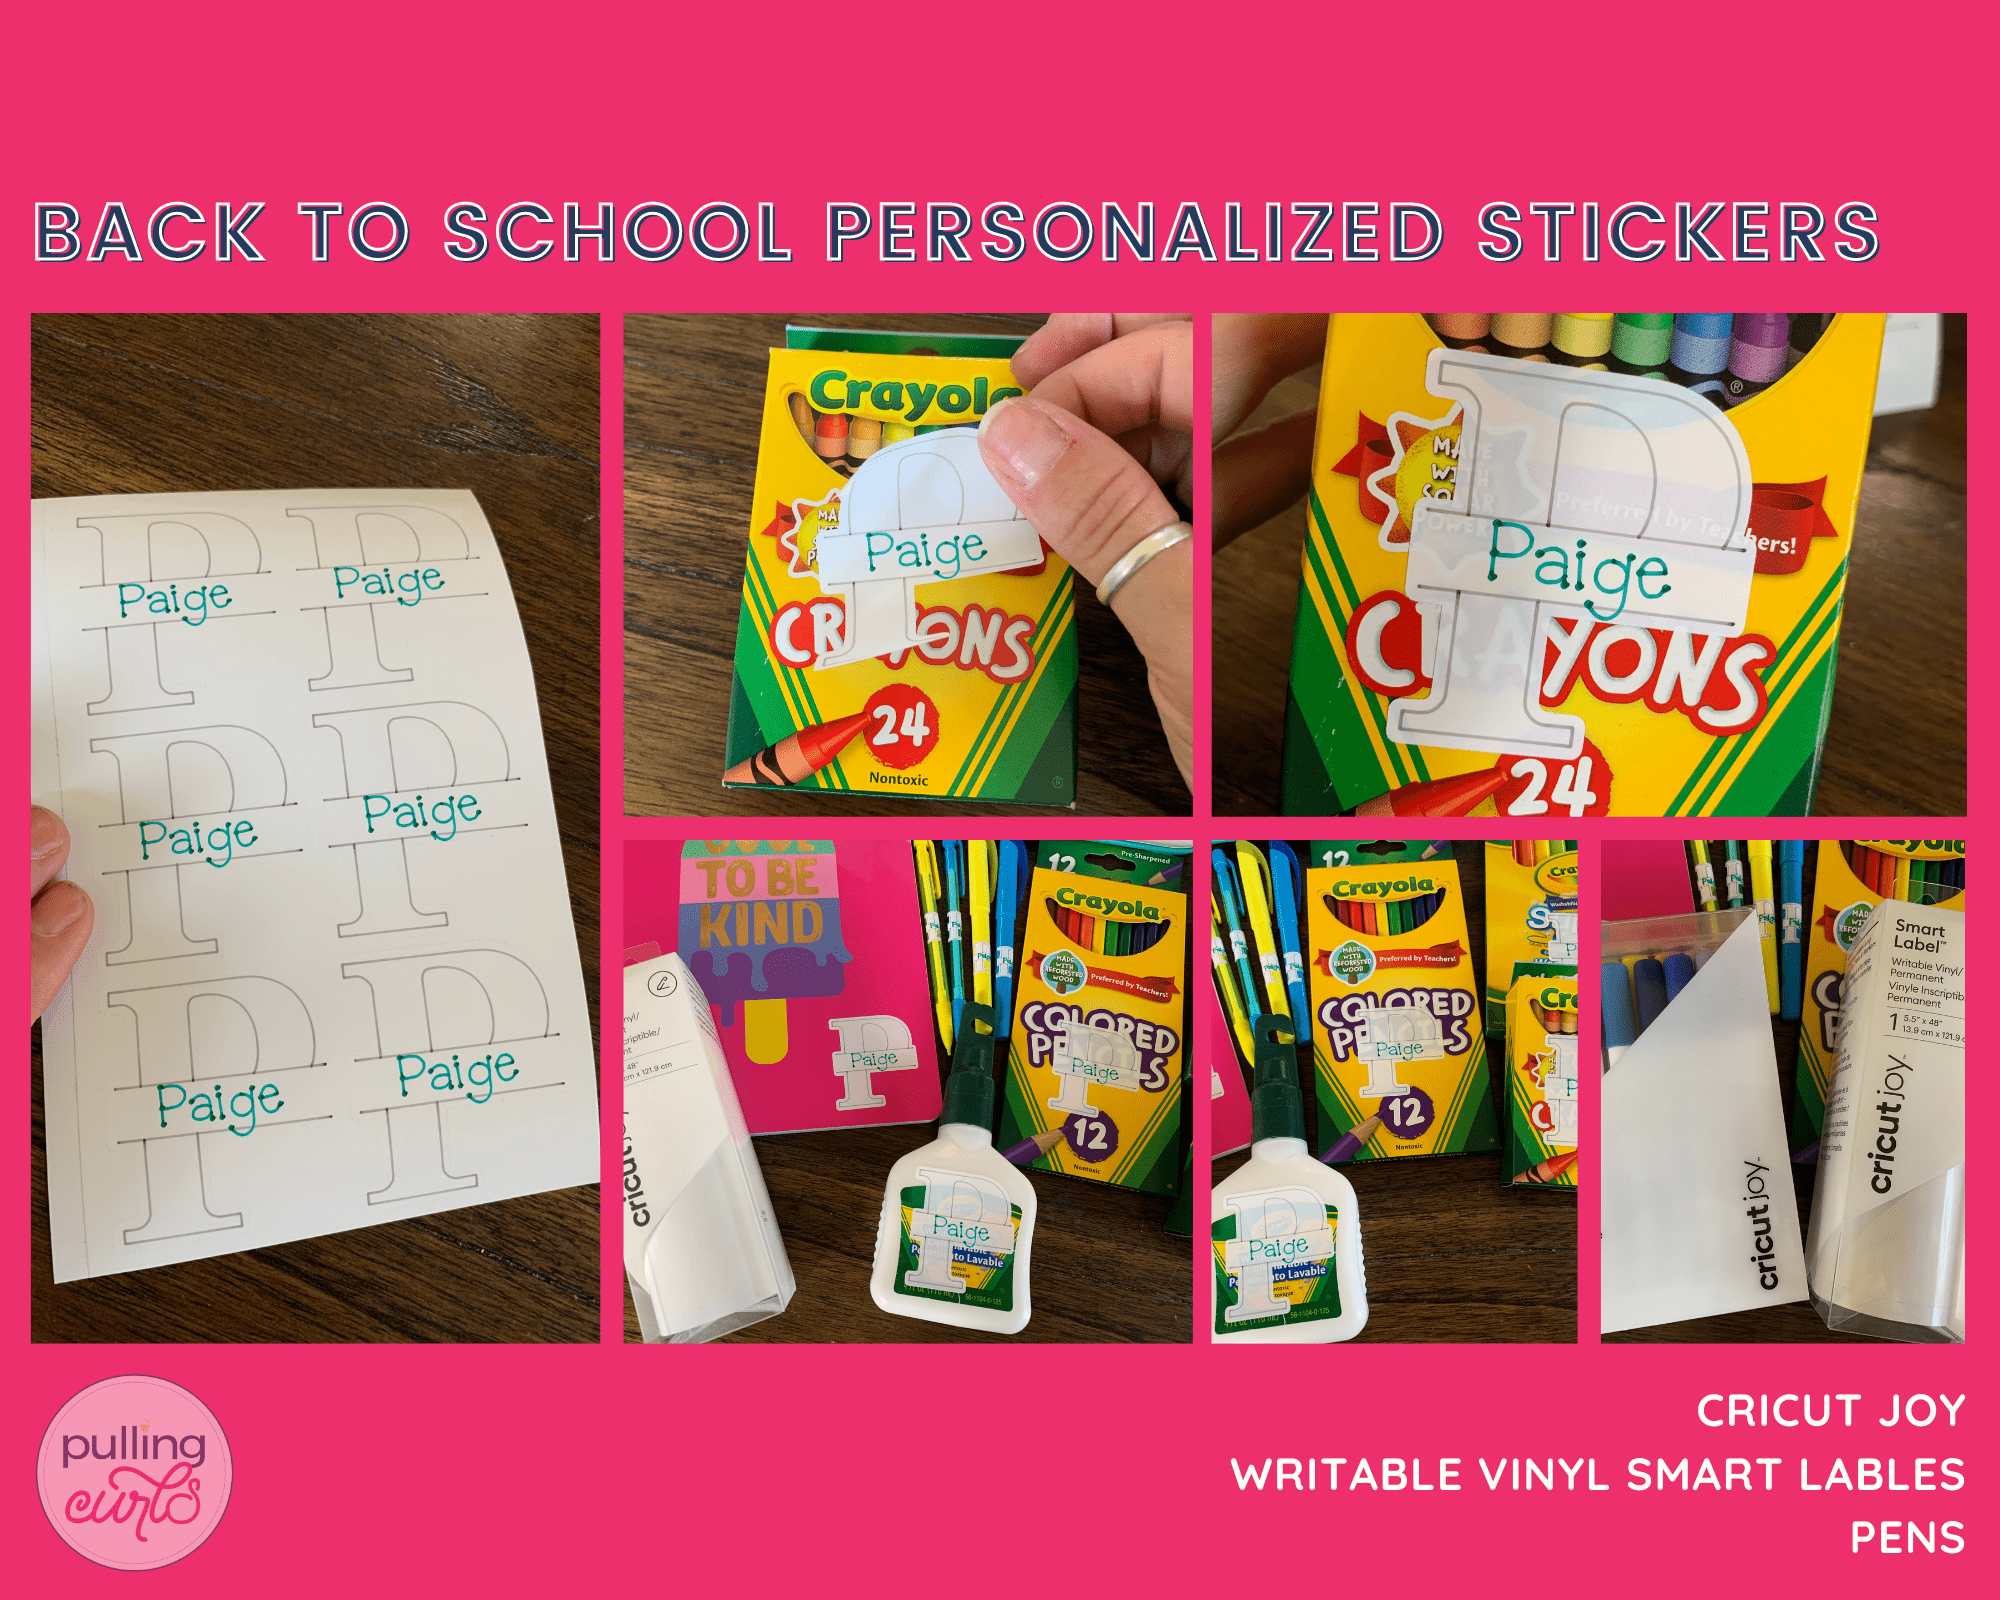
The font I selected to write “Paige” is Fontastic Fonts – DJ Doodlers and the Style is writing. I used the same image resized to 2″ tall to create the stickers for a lot of her other supplies.
Because they are a single cut they are just like a sticker so no Transfer Tape is required. I just peeled them up with my fingers and placed them where I wanted them.
The great thing about Smart Label Writable Vinyl is that the ink dries almost instantly. When using the Cricut Joy Pens I haven’t had any of them smear at all. Please note if you’re using a different type of pen or material please test them first so you don’t waste any of your vinyl.
Also, I have found these labels to be SUPER sturdy. Like, surprisingly so — so no need to worry they’ll be a mess by day 2.
Personalized School Folder with Monogram
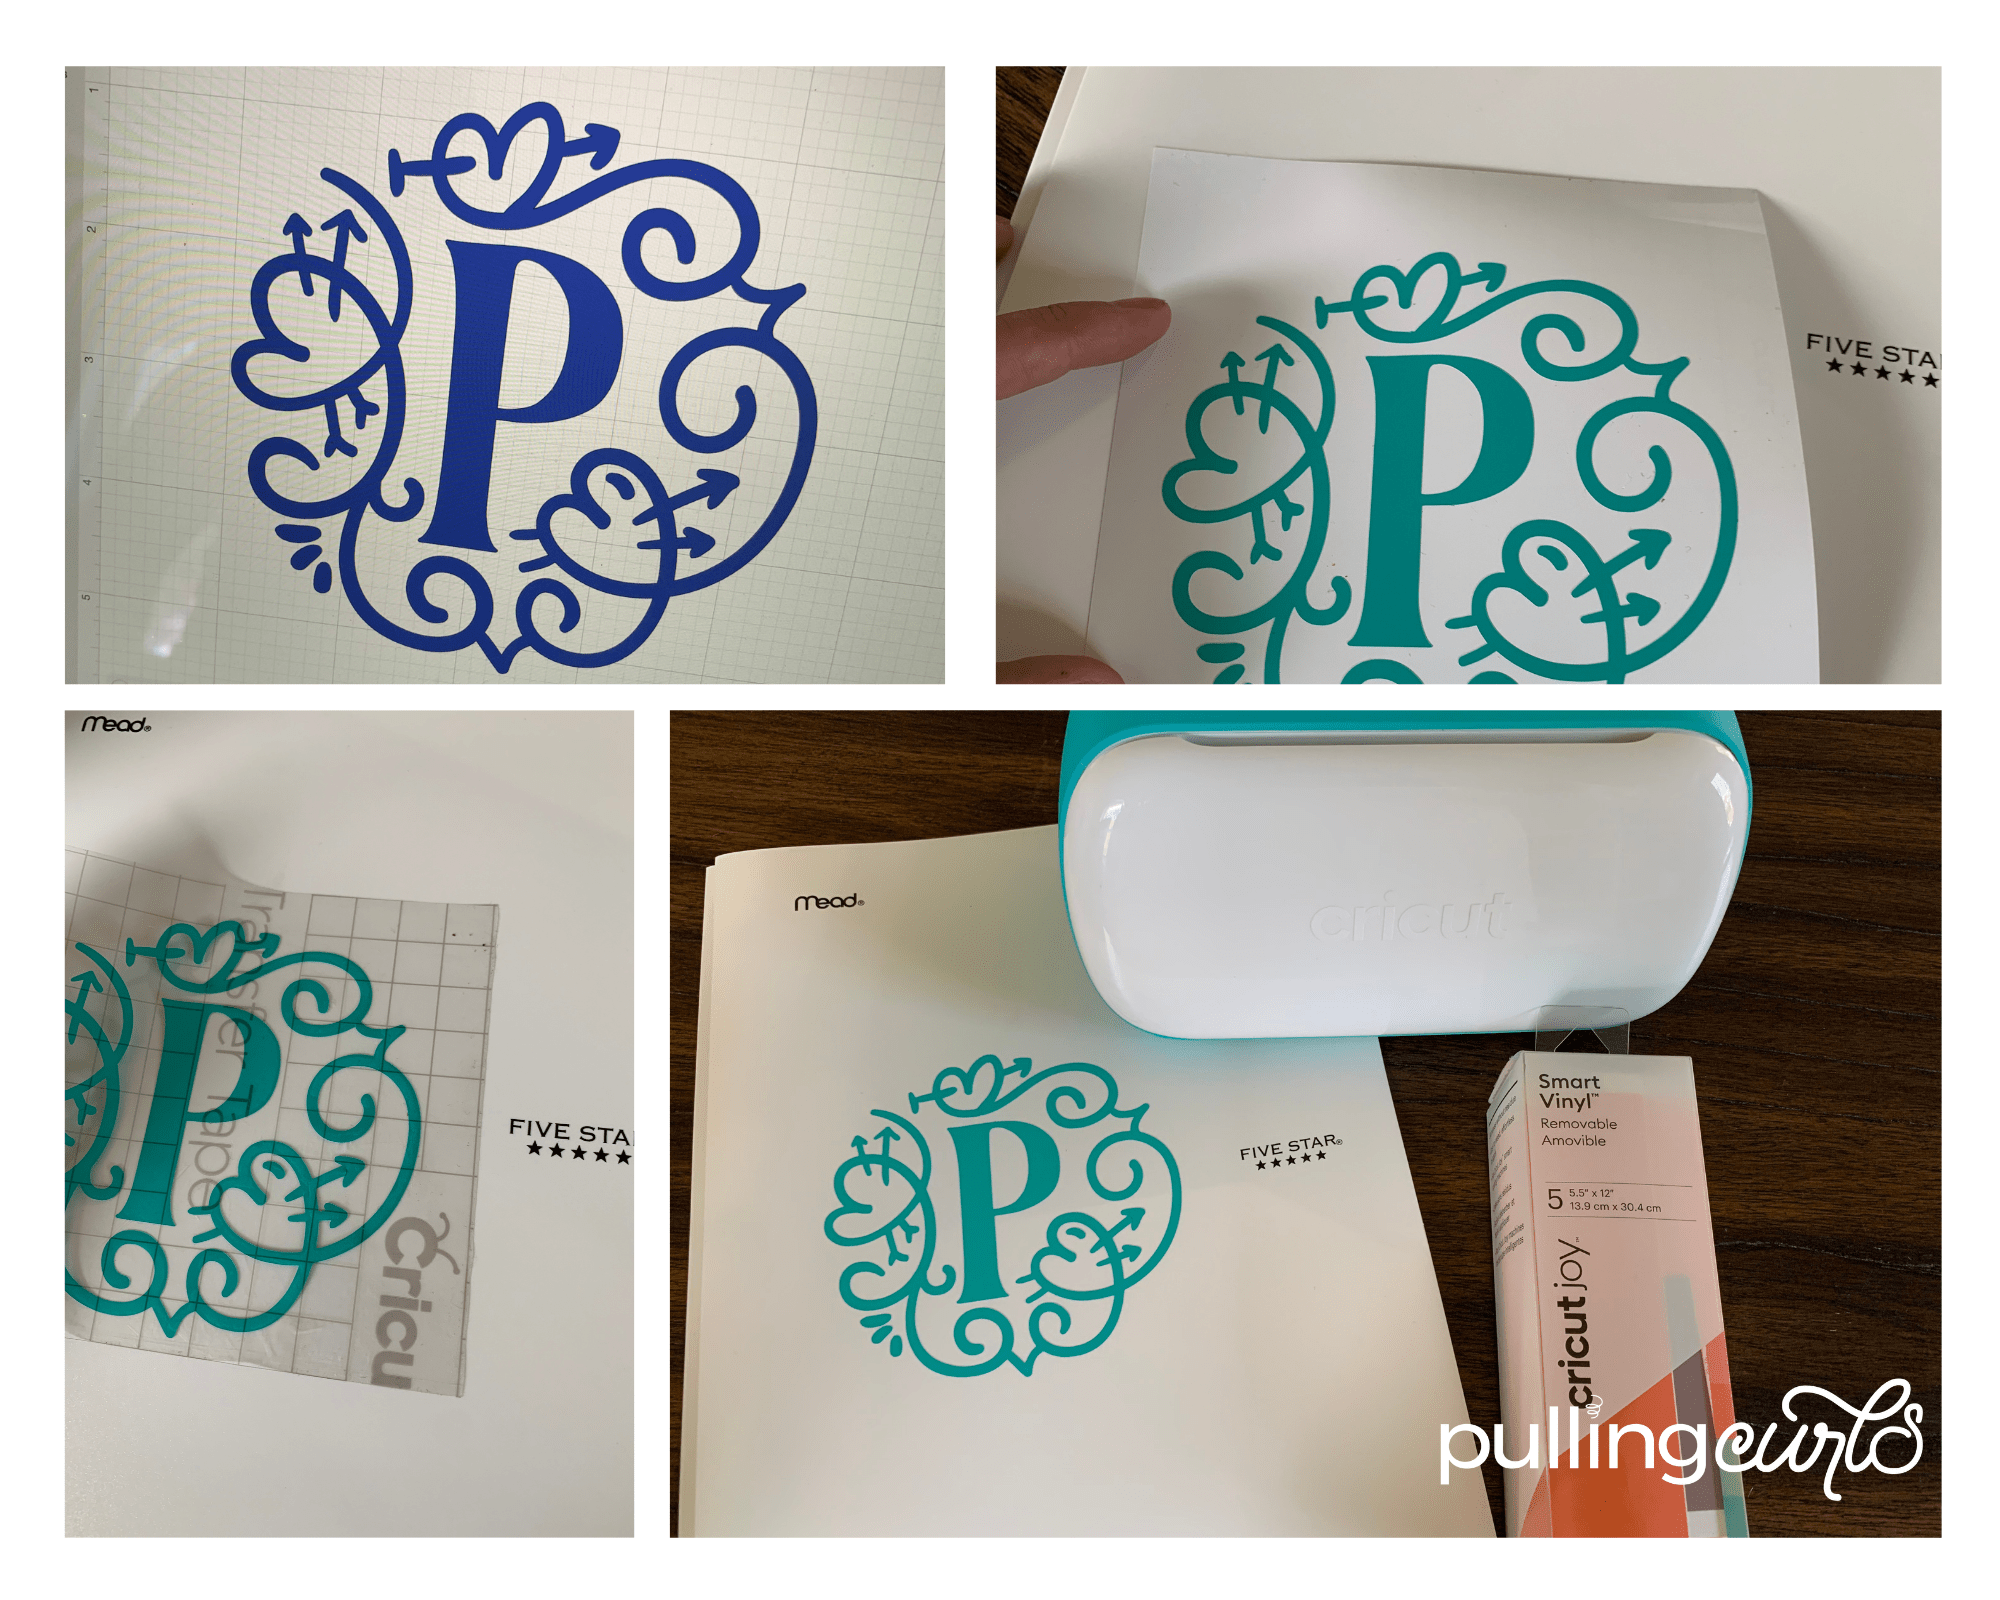
This might be Paige’s favorite project of the set. She needs a few of these plastic folders with a pocket and we found this monogram P in Design Space.
Supplies needed to create this project:
Cricut Joy
Smart Vinyl – (I used Removable Hydrangeas Sampler)
Transfer Tape
Scraper Tool
Weeding Tool
Plastic School Folder
Using some Smart Vinyl – Removable (teal from the Hydrangeas Sampler) we set the image size as large as we could cut on the Joy and applied it to the folder with Transfer Tape. This image is called “Valentines Monogram P” and the image number is “#M1284F18E”. Great news is there is an entire image set so it doesn’t matter what letter you need, it’s there!
Layered Monogram Pencil Box
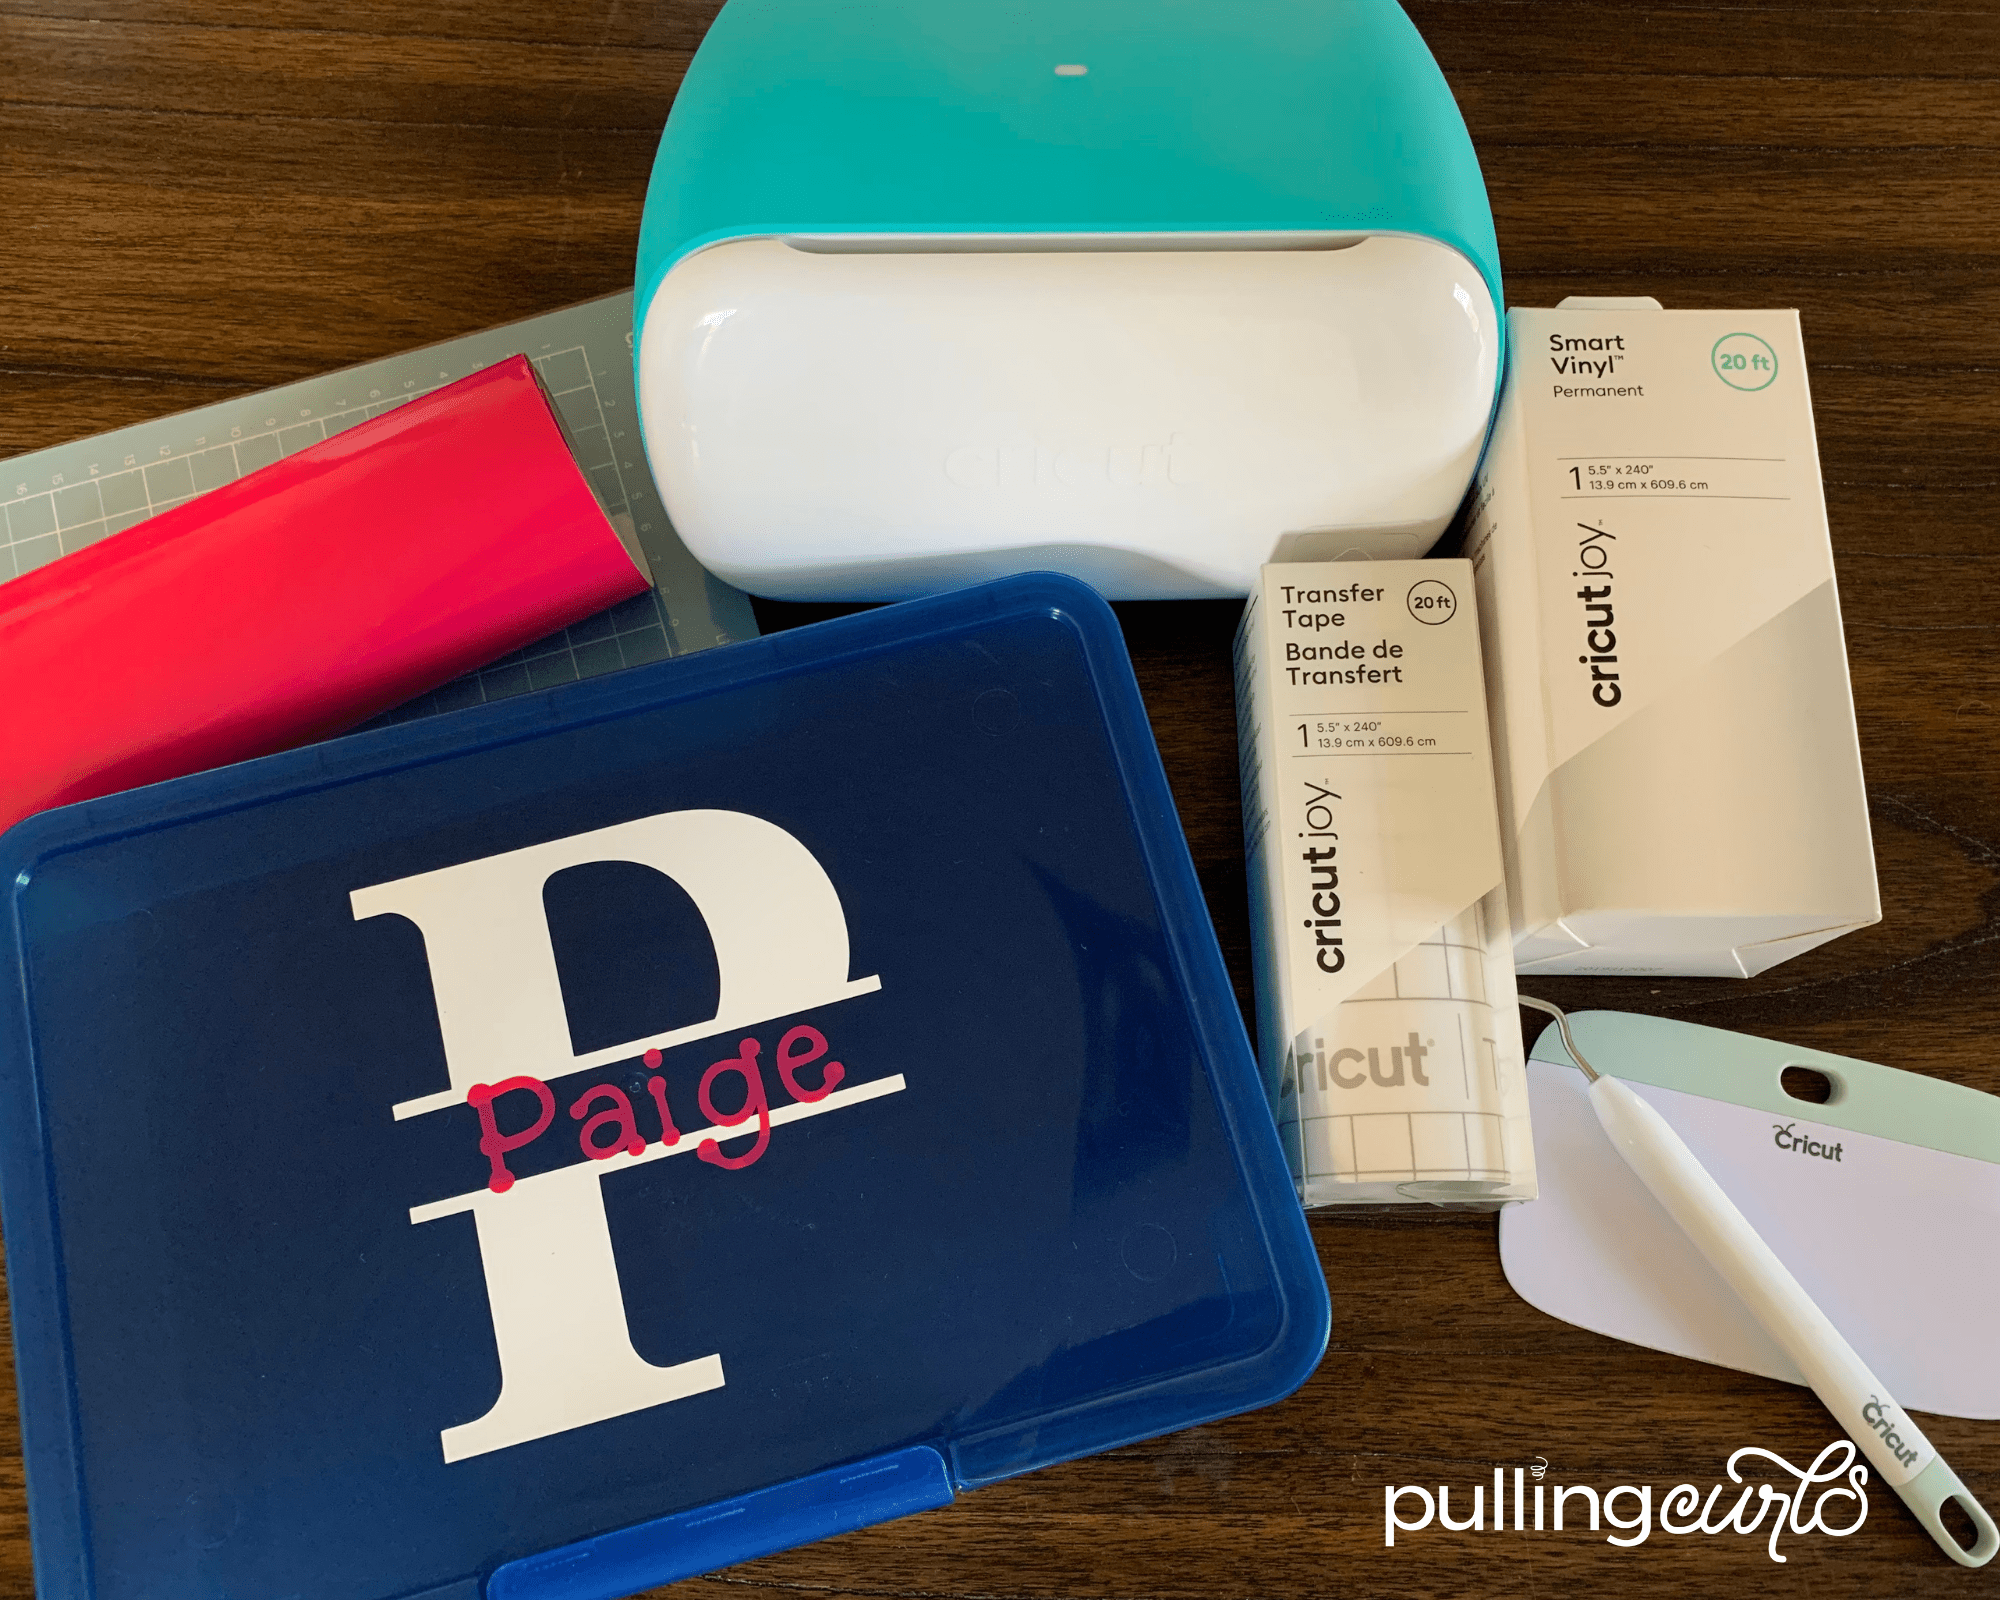
What says “school supplies” more than a pencil box? Everyone needs a pencil box to hold all their school supplies.
Can you tell we love monograms yet? We thought it would be fun to layer our vinyl this time.
Supplies needed to create a layered monogram pencil box:
Pencil Box
Cricut Joy
Cricut Smart Vinyl Permanent – White
Light Grip Mat
Cricut Vinyl Permanent – Pink
Transfer Tape
Scraper Tool
Weeding Tool
This is a simple project to create. Cut your materials as prompted by Design Space. Weed the excess from your design. Using Transfer Tape apply the single letter monogram first (for tips on using Joy Smart Vinyl and getting it to release from the backing check out this post).
Once the letter is applied, use the same Transfer Tape (as long as it’s still sticky) to apply the name in the opening of the split P.
Make sure everything is well attached with the scraping tool and remove the transfer tape.
The image we used for this project is “Serif Split Monogram P” and the image number is “#M2610EE49”. We used “Dj Doodlers” font for Paige.
Cricut Leather Luggage Tag
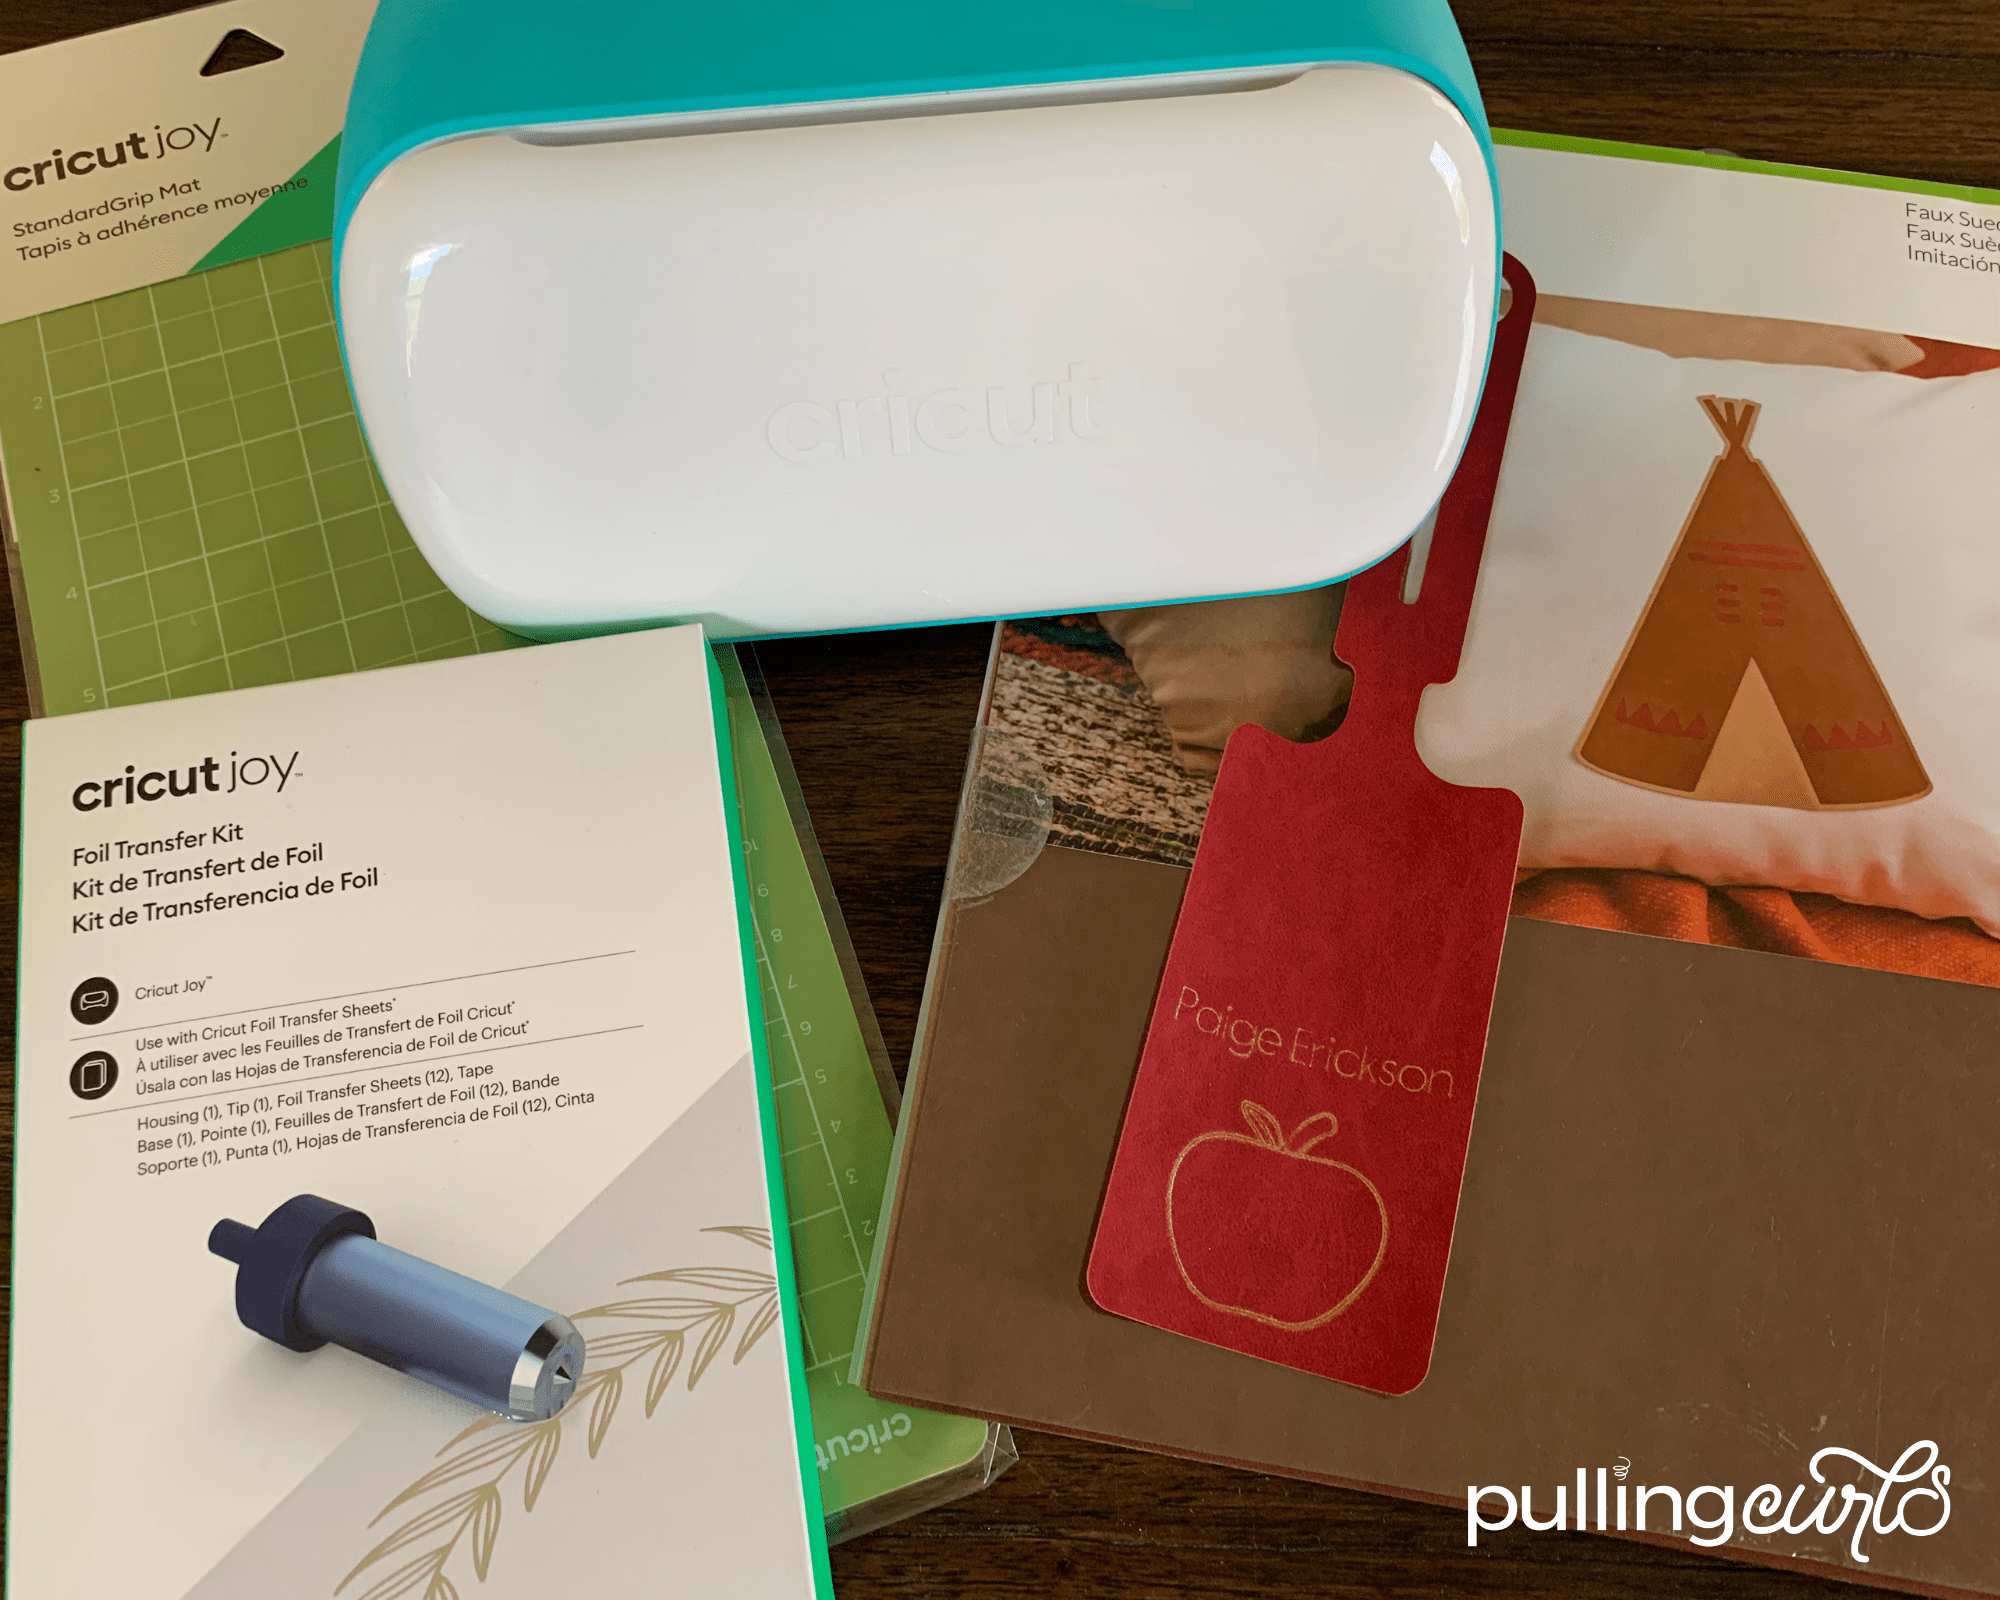
Did you know you can cut Faux Leather with the Cricut Joy? I’m going to teach you how! The new Foil Transfer Tool for Cricut Joy is so fun to use and I love how it looks on this red faux leather.
It’s always fun to personalize backpacks. When children are transported by you to and from school you can add their name to their backpack and not be worried about someone seeing their name. As they get older or ride buses or bikes there may be a need for some caution.
This luggage tag is a great way to label a backpack (inside or outside) without making their name easy for strangers to see.
Supplies needed to create a Foil Faux Leather Luggage Tag:
Cricut Joy
Foil Tool Kit
Cricut Faux Leather
Green Standard Grip Mat
If you want to make this project you might be thinking “but my Joy won’t let me cut Faux leather”. I did some testing and by selecting Heavy Cardstock the Faux Leather cut beautifully on the first time. Cricut Joy supports the material Heavy Cardstock.
Here is a tip to getting your Foil to transfer as well as ours did. You’re going to follow the directions for applying the foil in Design Space. After your Foil Tool is done doing it’s job your Joy is going to prompt you to remove the Foil Tool and insert the fine point blade.
Here’s the tip. Take out the Foil Tool but don’t put in the blade. Do not remove your Foil sheet. Select go and your machine will think it’s cutting. Once it’s done “cutting” it will give you the opportunity to “rerun”; you want to do this without unloading the mat. This will allow your Joy to run the Foil Tool in the exact same spot and give you a nice clean transfer.
Now you can remove the foil sheet and change the foil tool to the fine point blade. Allow the machine to cut the faux leather. My machine cut it beautifully without having to do anything extra. I do recommend checking the cut before unloading your mat to make sure it cut cleanly.
I used the Luggage Tag image #M199A47DB, Apple Image #M26D21A0A, and font Elementary. Make sure for the Apple Image and Font you change the “Style” to Foil.
Another backpack label option:
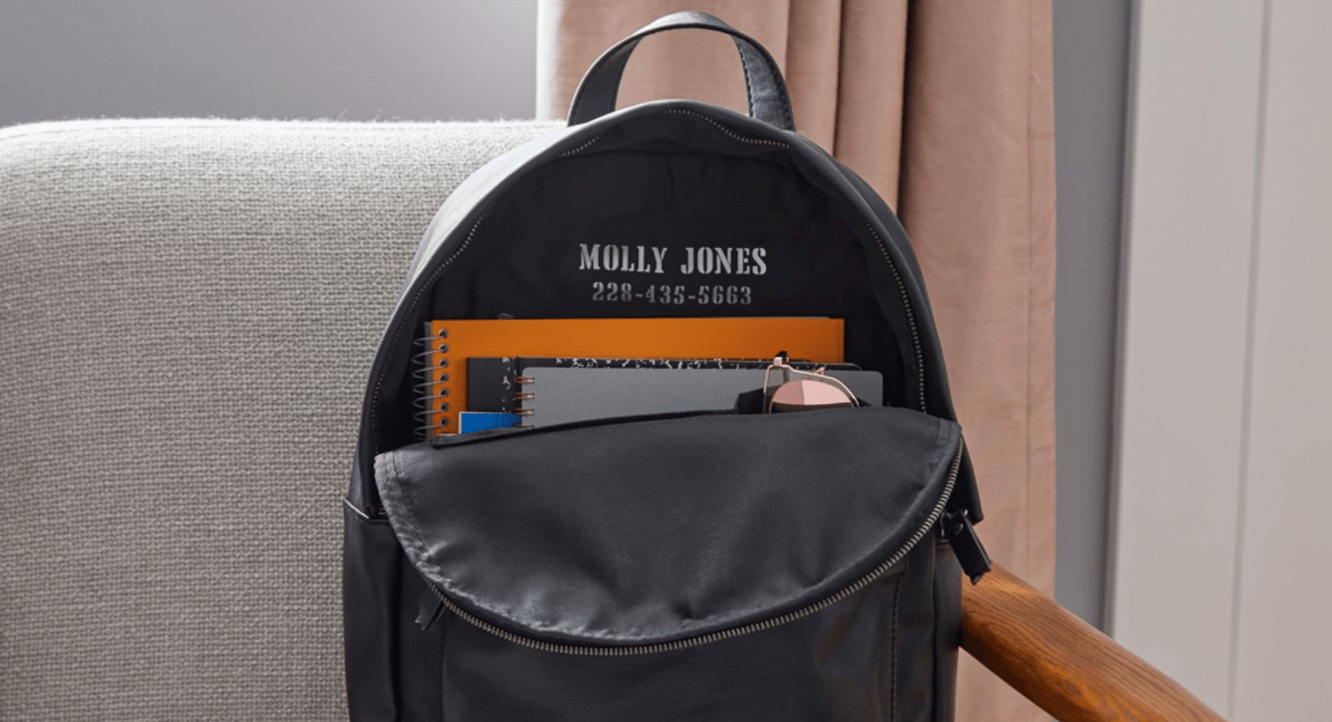
If you’re looking for a more permanent way to label your child’s backpack that doesn’t have their name on the outside check out this project in Design Space. You can click that link or search “Backpack Name and Number” under projects in Design Space.
Final (and most important) Back to School Supply!
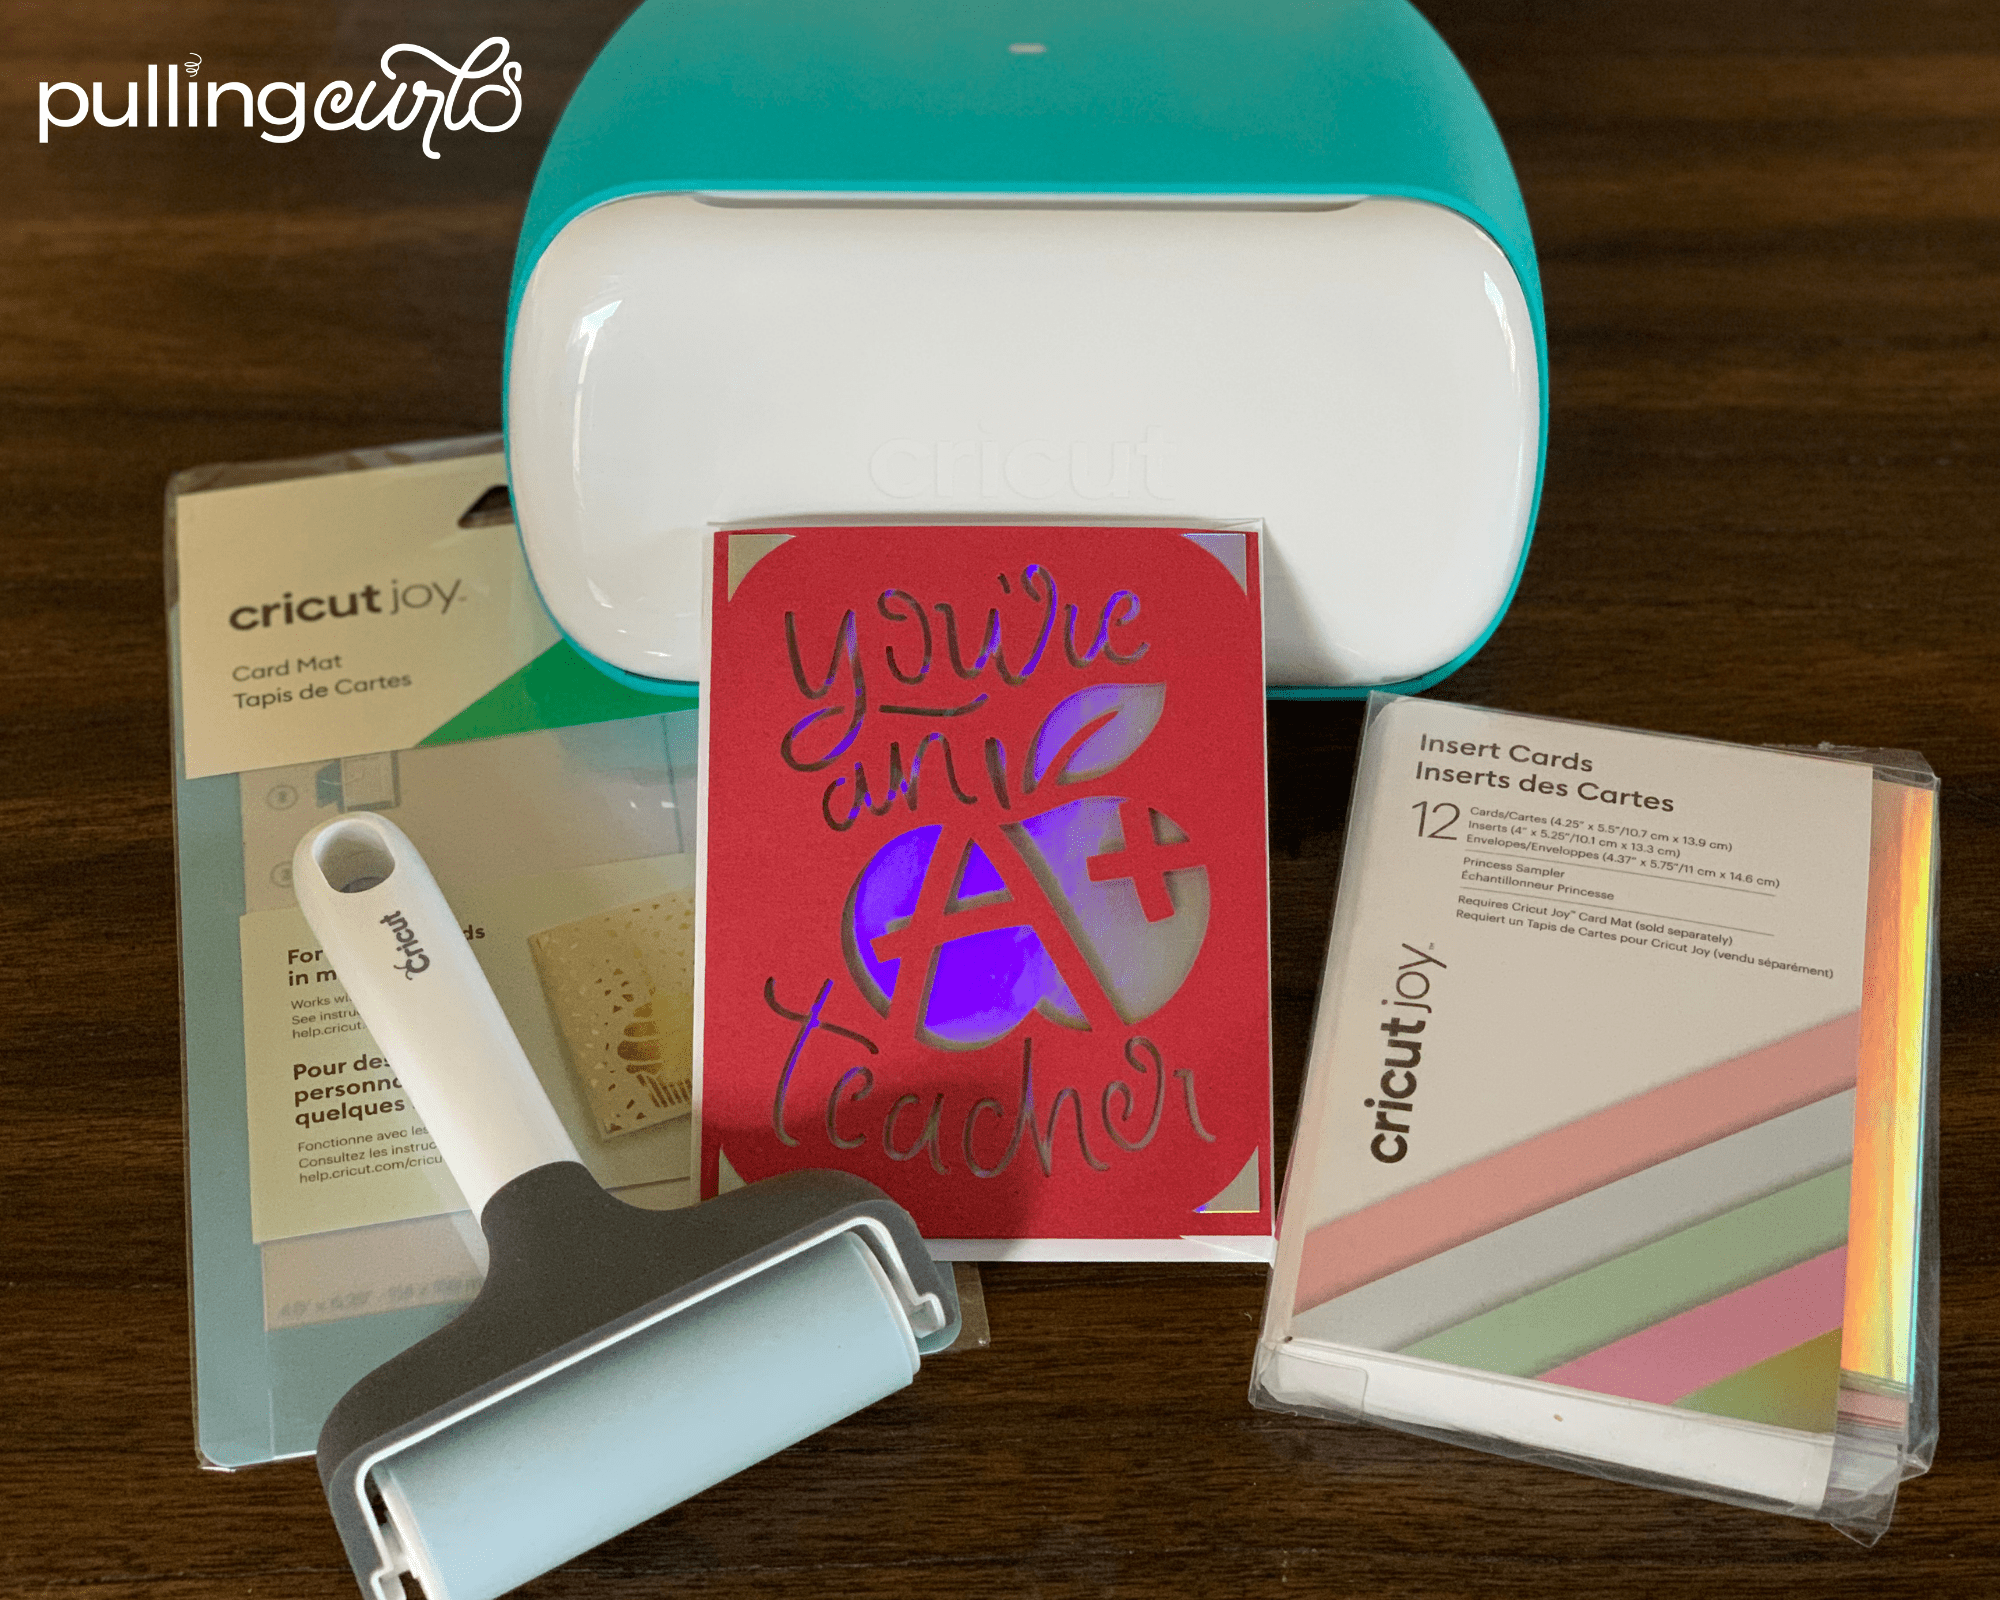
If you aren’t using your Cricut Joy to create handmade cards you’re missing out. The Card Mat and Insert Cards are so fun and quick. Design Space has so many different designs to choose from you’re sure to find something that fits your needs. I had fun creating this card with my daughter and she’s excited to give it to her teacher. This is a great opportunity to share any concerns or things she’s looking forward to in the new school year. It’s also an opportunity for you to share any of your thoughts, concerns, or abilities to help out with the teacher too.
Supplies needed to create this card:
Cricut Joy
Joy Card Mat
Insert Card Kit – Rainbow Scales Sampler
A+ Teacher Card cut file in Design Space
Brayer
I’ve seen a lot of people complain about the Card Mats losing their stick. Using a Brayer to really burnish the card onto the mat has helped me have successful cards every time. I also suggest always placing the clear plastic sheet over the top of the mat when not in use to protect the adhesive from dust.
Insert cards are super easy to create. Just follow the prompts in Design Space and you’ll have a card in minutes.
Why personalize back to school supplies with Cricut Joy?
I don’t think I’m alone with kids who are a little apprehensive about returning to school. Taking the time to sit together and come up with ways to label all the school supplies gave us an opportunity to talk about what they’re excited about and maybe a little worried about.
By the time we had all the supplies labeled Paige was excited to put everything in her backpack and show her friends some of the cool labels.
Tips for working with Cricut Permanent Vinyl
Personalize back to school supplies with Cricut Joy for long lasting labeling! For the best results when working with Cricut Permanent Vinyl here are a few tips to follow:
- Make sure your surface is clean. It’s recommended to wipe things clean and then when possible wipe with rubbing alcohol. Allow to dry completely before applying vinyl.
- When applying vinyl burnish well with the Transfer Tape on top of vinyl to make sure vinyl is well adhered to the surface. I recommend leaving the Transfer Tape on top when burnishing to prevent any scratches in the vinyl.
- Do not handle your project for 48-72 hours after applying vinyl. This allows the adhesive time to adhere to the surface for permanence.
I hope these projects have inspired you to sit with your child and start getting ready for school. Cricut Joy is a great way to label school supplies and if I can have fun doing it I know you will to!
If you have any questions leave them in the comments and I’ll do my best to help you out.



Leave a Reply